Watch this video for a step by step process on how to Grant all Privileges to a User in MySQL with cPanel
The MySQL privilege system authenticates a user to make specific changes in a database. Based on the privileges granted, a user can carry functions like SELECT, INSERT, UPDATE, DELETE etc. on the database. You can access this system in cPanel.
To Grant all Privileges in MySQL with cPanel:
1. Log in to your cPanel account.
2. Go to the DATABASES section and click on MySQL® Databases.

3. Scroll down to the Add User To Database in the MySQL Users section. Select the user you want to assign privileges and also the database of your choice. Now, click the Add button.

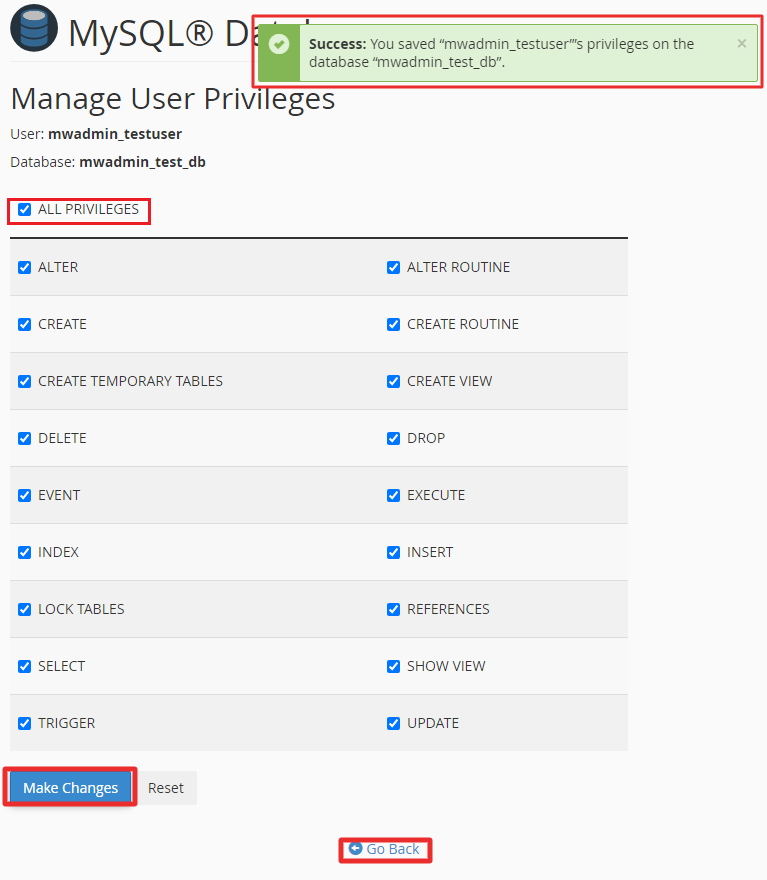
4. The system redirects you to Manage User Privileges, where you can select the privileges you want the user to have.
5. Since we want the user to have all privileges, tick the ALL PRIVILEGES box and click the Make Changes button. A success message will flash indicating the system has saved the selected privileges for the user. Click on Go Back at the bottom of the list.

You will come back to the MySQL® Databases. Here, you can spot the user you just granted privileges under the Privileged Users column of the Current Databases table.


