In this article we’ll go over the basic process you would need to follow if you have a single cPanel account, and you’d like to split that one account up into multiple cPanel accounts. You can only have multiple cPanel accounts on a VPS or dedicated server plan where you have access to WHM (Web Host Manager), and splitting up your domains into separate cPanel accounts can help you better organize your sites, and split up access between multiple end-users easily. Users with Shared and Reseller plans can ask their web hosts to do the same for them.
In this article, for example, we will be taking our cPanel account converting addon domain komaladmin to the stand alone account. This is possible if you have root access to your account.
Step1: Login to your WHM
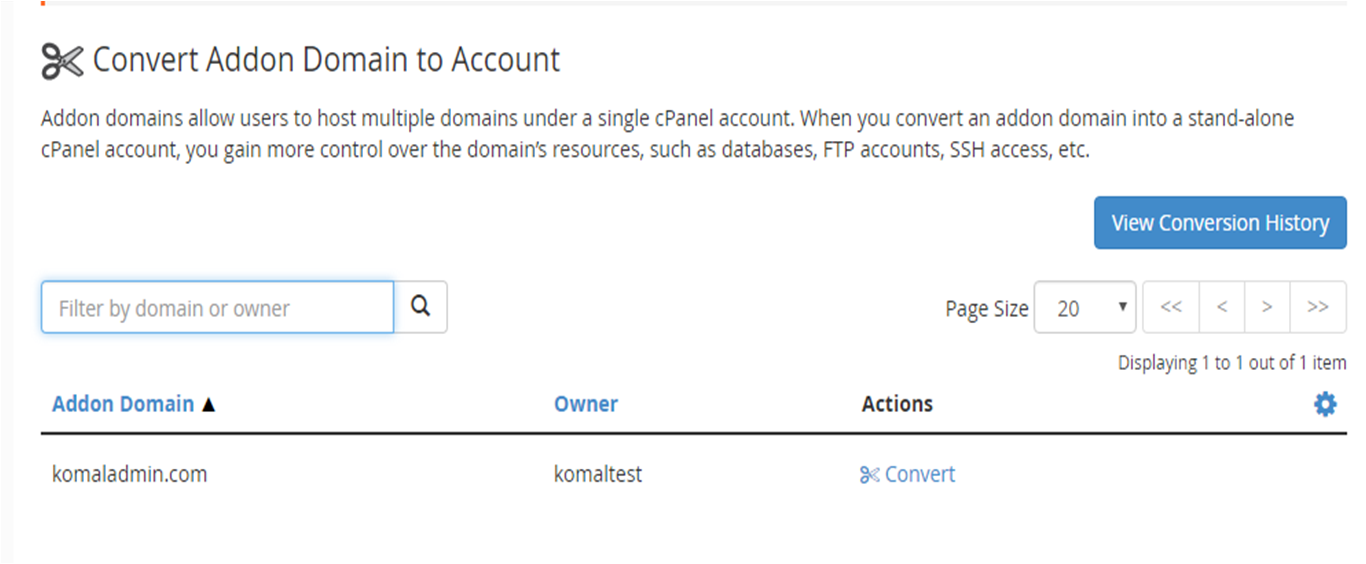
Step2: On the left corner search “Convert Addon Domain to Account”. Click on the same.
Now you will be served with
Step3: Search your Addon domain to be converted and click on the “Convert” option available there below actions.
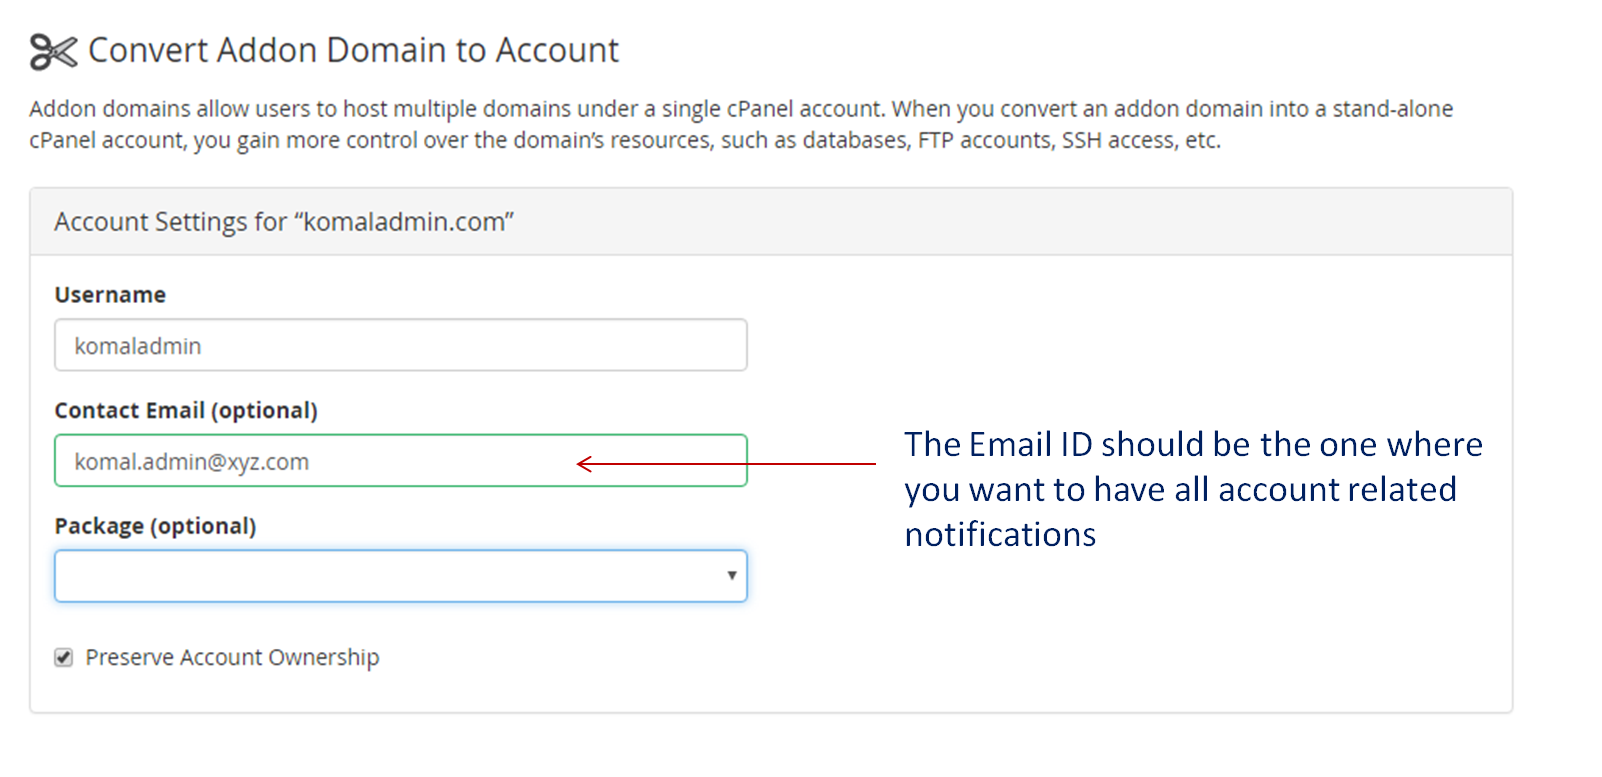
Step4: You will be served with a form named “Account Settings”
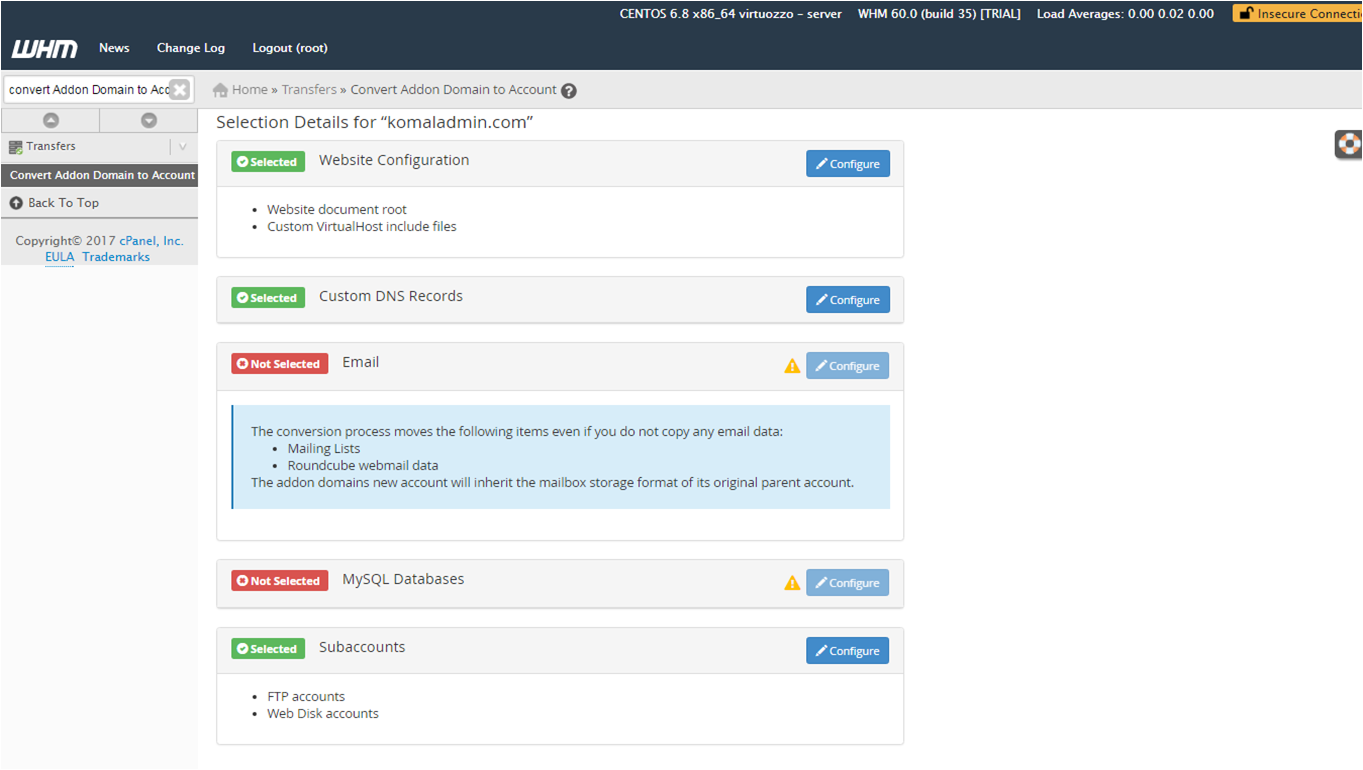
Below you will find some selection details. Where you can configure your Data Base your Email account you need to have in the account.
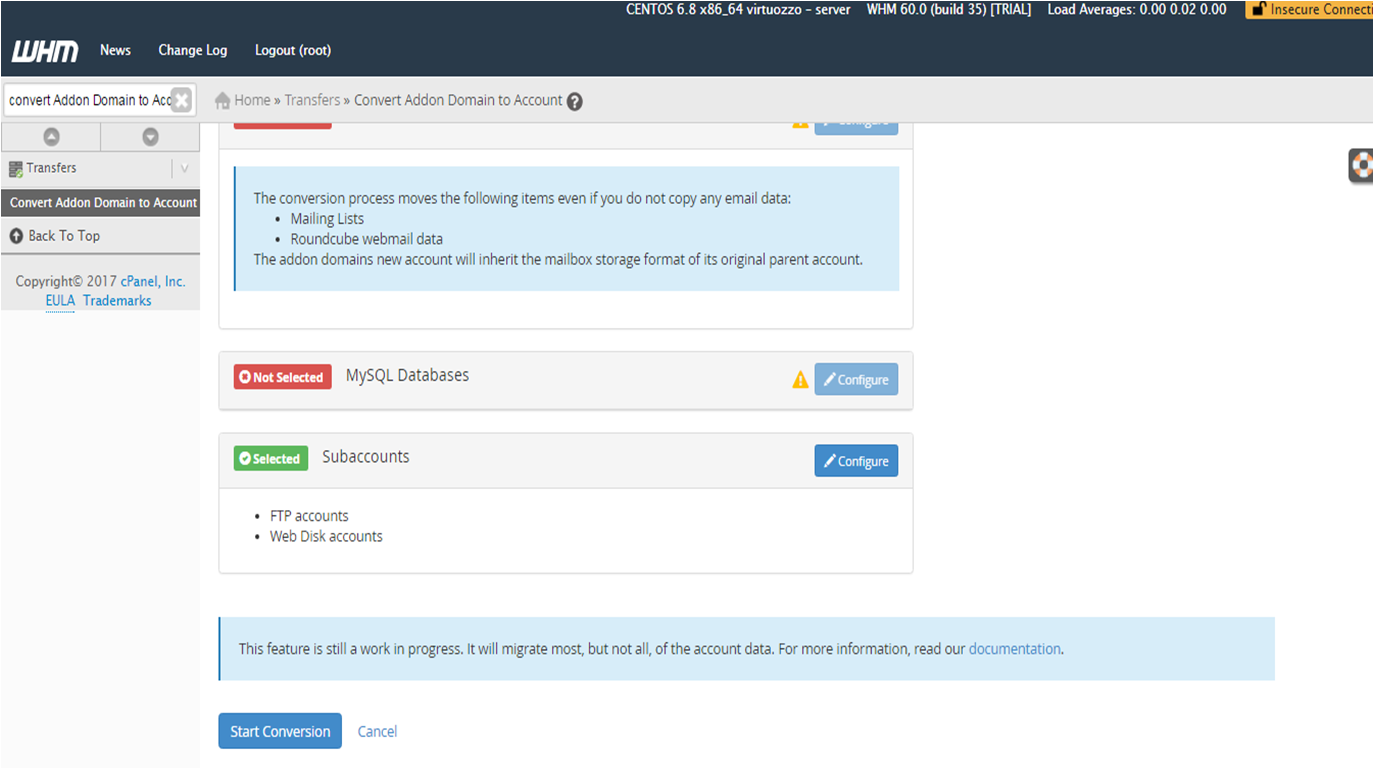
Step5: Now click on “Start Conversion” button
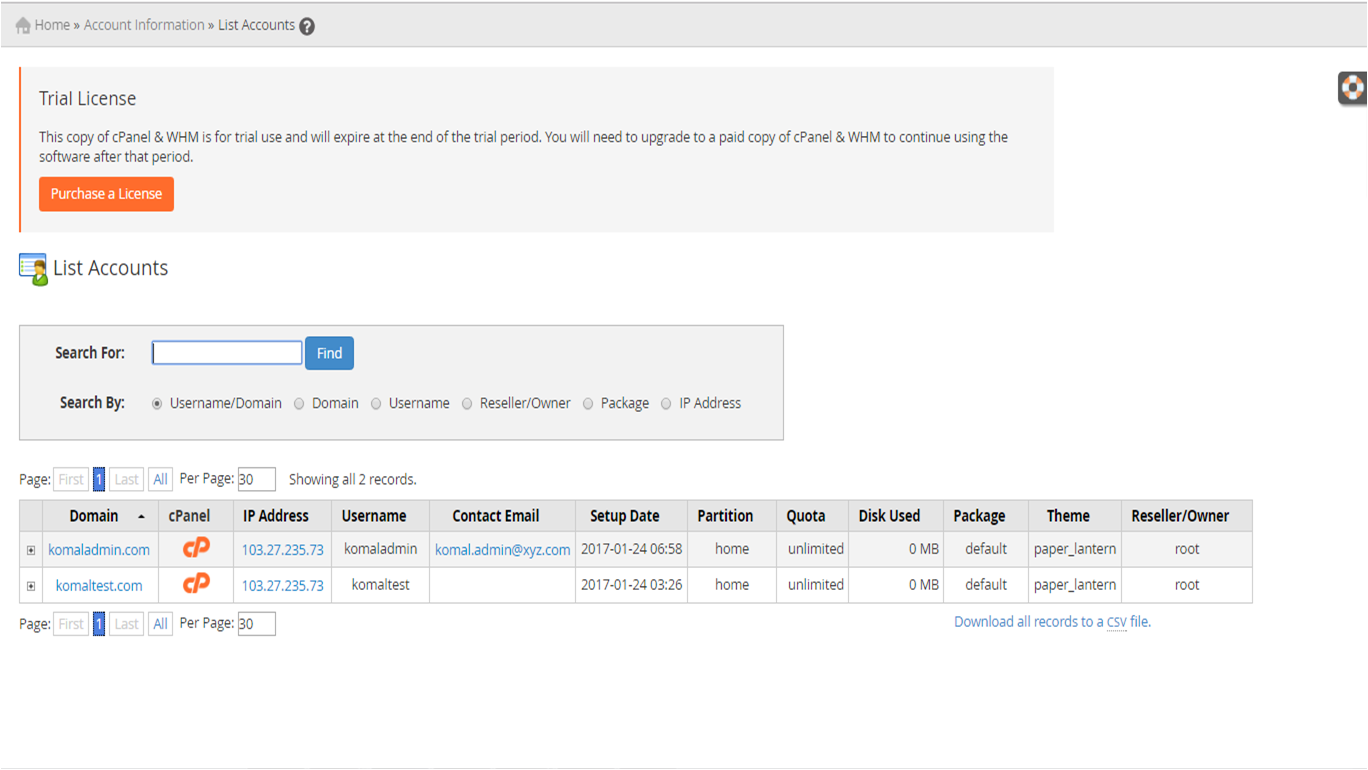
Step6: Now on the left corner search Lists Accounts, click on the same to check whether the account is created or not. If yes it will be listed below.
Now you have a standalone separate account with database and email accounts. Congratulations! You are all aware of how to create multiple accounts on cPanel account.
Related: How Can I Create Different Types Of Web Redirects Through cPanel?


