An FTP client for Windows OS that assists the secure SFTP and FTPES protocol types as well as unencrypted FTP is called as WinSCP. WinSCP stands for Windows Secure Copy. It can be used with the main cPanel SFTP access as well as with the separate FTPES accounts that are created in the “FTP Account” section of the cPanel.
In case you are creating a separate account just for one domain, you will need to set the nameservers to point your domain to your hosting for a minimum of 24 hours.
In order to use the software for SFTP and FTP connections, you should follow the instructions in this tutorial and set up a private key in pageant.exe. Then the key will be used automatically by WinSCP while connecting to your account.
Steps to Connect to Your Account with WinSCP
After getting ready, open the WinSCP program that you installed. Now, a new window named Login will automatically open where you will be asked to provide login information about the location that you want to connect.
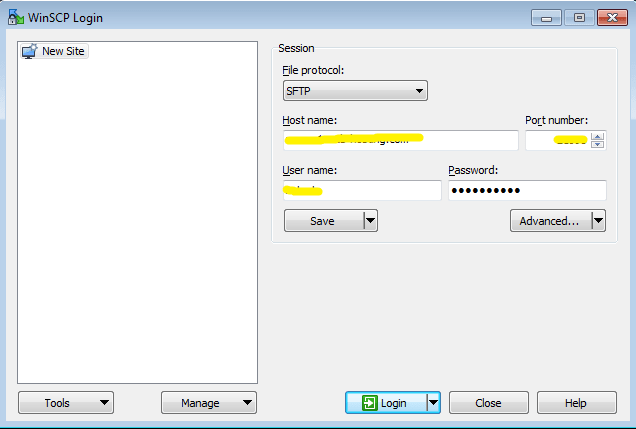
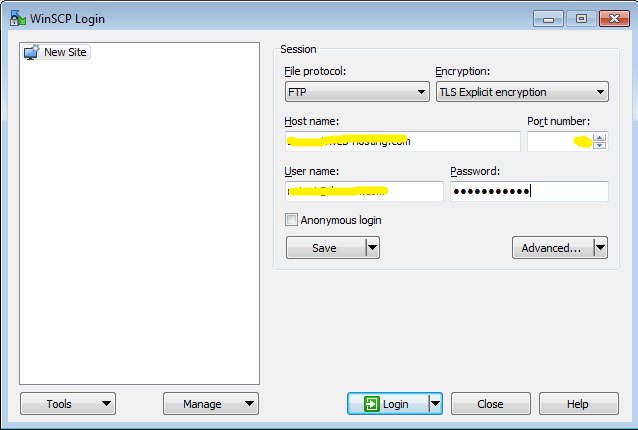
Fill the options as below:
SFTP Settings

File protocol: SFTP
Host name: the server on which your account is hosted
Port number: as defined by your host
User name: your cPanel username
Password: your cPanel password
FTP Settings

File protocol: FTP
Encryption: TLS Explicit encryption
Host name: the server on which your account is hosted
Port number: as defined by your host
User name: cPanel username or the FTP account username
Password: cPanel password or the FTP account password
Once you have filled all the fields, click on the Login button at the bottom.
A dialogue-box prompting for adding the identity of the target server to the cache will get displayed. Here click on “Yes” to not to see this warning again.
You will now get connected to your account and see all the files and folders on it on the right side panel. All the files and folders on your computer will be located on the left side panel.
Steps to Transfer Files
Once the connection is successfully established, the directory listing will be opened:

You will get support for drag-and-drop as well as graphic interface functions with this FTP client. You can transfer large files only with a stable Internet connection. If the connection fails even after you enter the correct credentials, it is required to disable anti-virus/firewall software temporarily as these can be hurdle to your successful connection.


