For any ecommerce website, consistent shipping is an important part. If your website has an easy shipping process, it is beneficial for you and your customers too as you can keep a track of shipping easily and send purchased items instantly.
There are robust shipping features built-in WooCommerce that give you the flexibility to set up your website shipping as per your business needs. Moreover, the user-friendly interface helps in setting up shipping in WooCommerce just within minutes.
WooCommerce Shipping Zones
Once you have installed WooCommerce, first identify your Shipping Zones. The identified zones will let your customers know about your shipping location and also, allow you to configure different shipping methods and rates depending on the zone.
General Settings
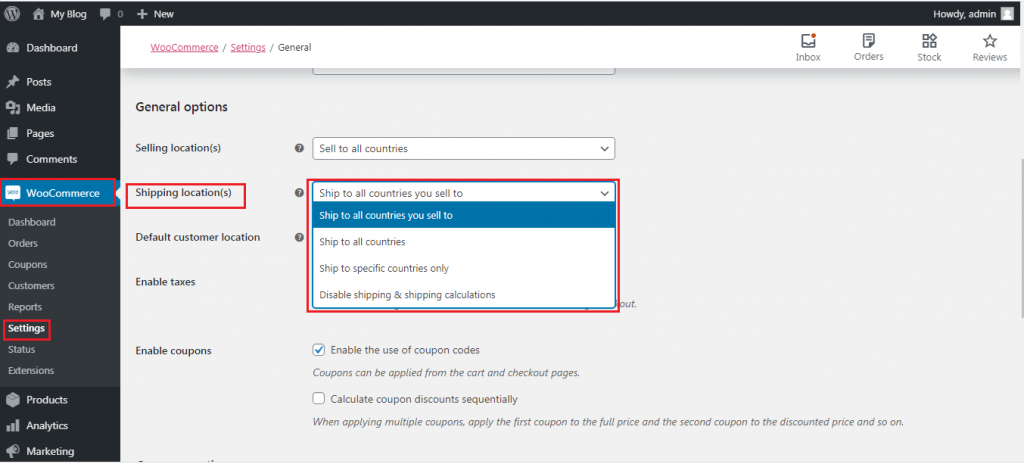
To start the setup of your shipping zones, go to WooCommerce >> Settings. Then go to Shipping Locations and use the drop-down to check and select an option. Mostly, store owners select Ship to all countries you sell to that updates the Selling Locations option above. But, you can also select Ship to all countries or Ship to specific countries only. There is also an option – Disable shipping & shipping calculations, but it is recommended to use only if you are not selling (services for example) shippable items.
Shipping Tab
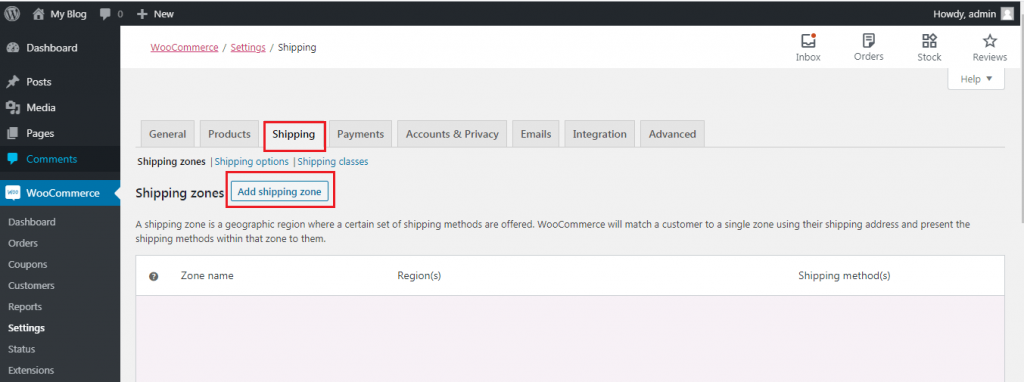
1. Go to WooCommerce >> Settings >> Shipping and choose Add shipping zone.
2. On the next screen, add the Zone Name and Zone Region. You can select the zone name of your choice, but the region will be determined by a drop-down list with pre-configured locations similar to what you choose in the Shipping Location field under the General tab.
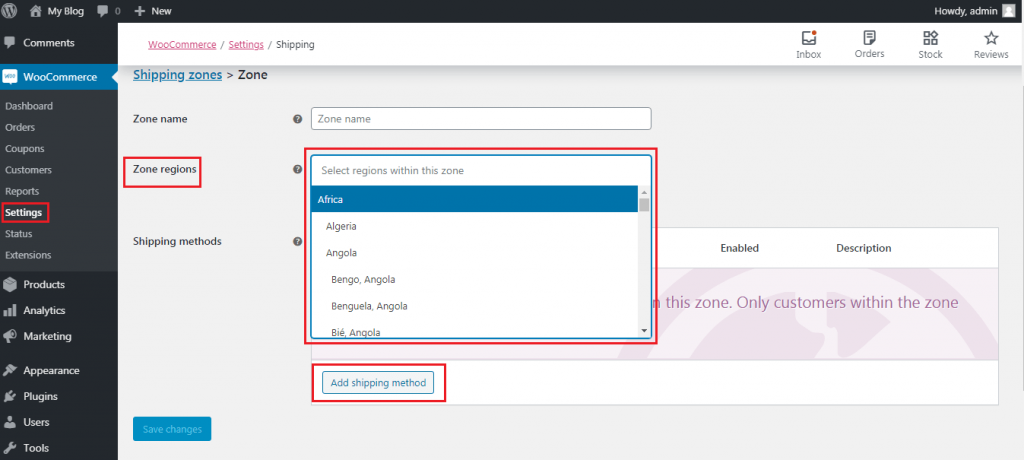
Additionally, you also get accurate range of a zone by adding postcodes in the field under Zone regions. This helps you when you want to charge different rates per state, for instance.
4. Now, click on Add shipping method and select one from the drop-down list. The options are:
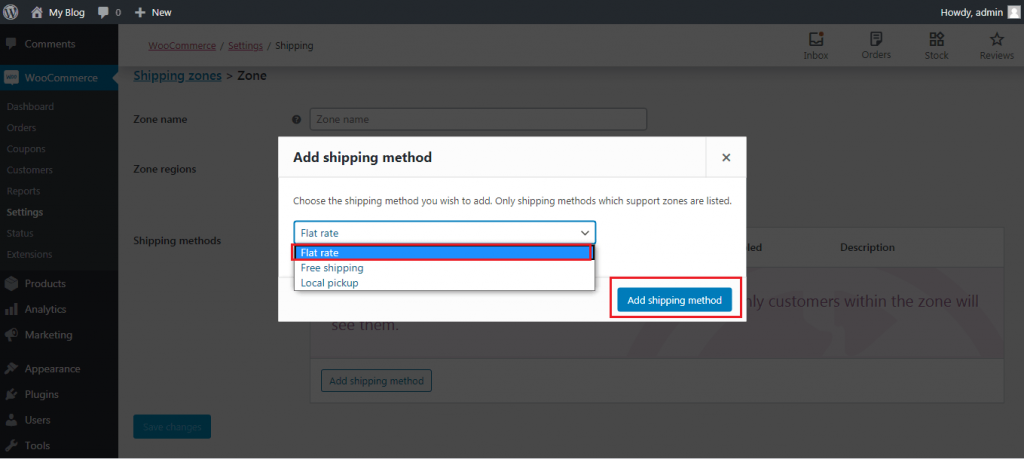
- Flat rate — It enables you to set a flat rate for all orders purchased for that shipping zone.
- Free shipping — It makes all shipping free for that shipping zone.
- Local pickup — It indicates to the customer that they must pick up their order from the store.
5. The above are the default options found in WooCommerce. But, you can add other options, like USPS, FedEx, UPS, etc. by installing and activating the respective plugin. Again click on Add shipping method button and then Save changes to save your new shipping zone.
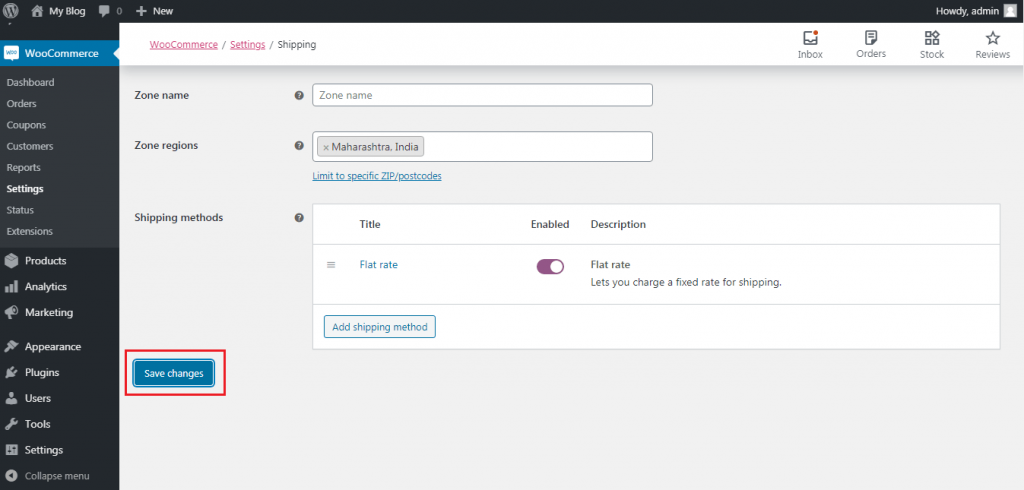
6. The above options can be used to create as many shipping zones as you want to, enabling for specific shipping rules for all of the customers you provide service to. It is also possible to manage the shipping zones you create. Moreover, your zones can be updated as your website grows.
WooCommerce Shipping Rates
WooCommerce shipping rates enable you to charge your customers to ship their orders. Let’s check the set up of flat rate shipping, but note that the process will be similar for both default and third-party methods.
1. Go to WooCommerce >> Shipping >> Shipping Zones and select the shipping zone you want to configure.
2. Now, click on the shipping method you selected for the shipping zone. Here, we have selected Flat rate. Click on the Edit link for Flat rate.

3. In the Cost field, mention the cost of your flat rate shipping.
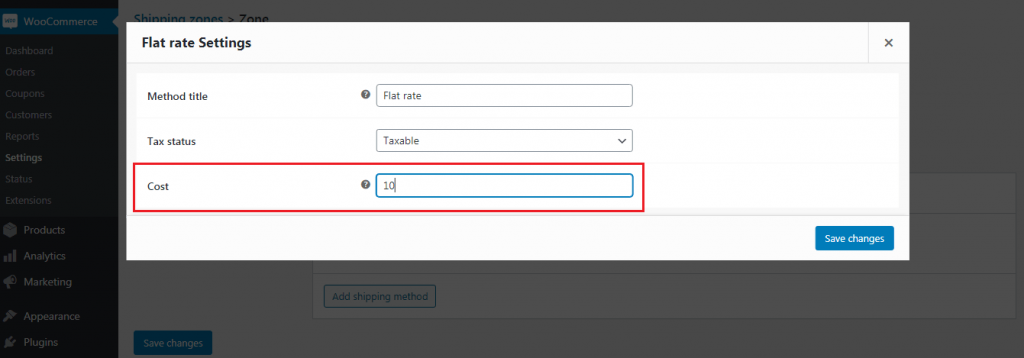
4. For adding the shipping fee to the entire order, just add the amount.
5. For adding shipping fee per item, add the formula [qty] * 10. Replace 10 with the amount you want to charge per item.
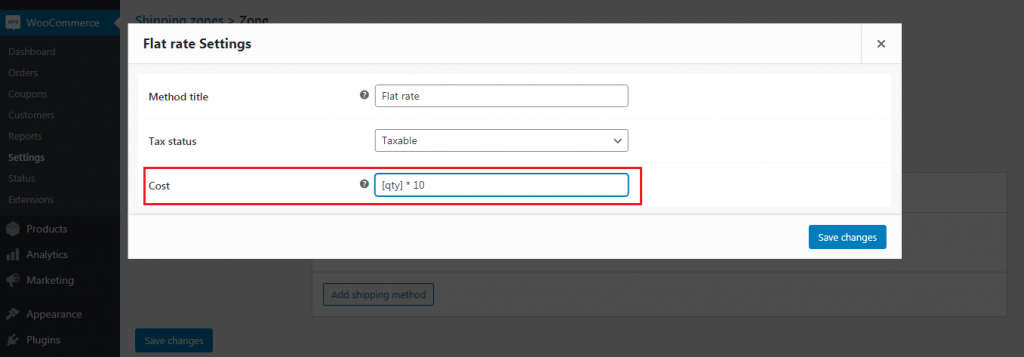
6. If you want to set up the shipping fee as a percentage of the total order, include the formula [cost ] * .10. Replace 10 with the percentage you want to charge for the complete order.

7. Click Save changes.
WooCommerce Shipping Classes
With shipping classes, you can add an extra fee to certain products, such as larger items. It can also be used to charge urgent shipping options such as 1-day or overnight shipping.
Note: You can plan on the way, you want your shipping to work and create the shipping classes previous to creating the shipping zones. With this, the time required for the setting up your shipping will get reduced because classes are mentioned on the shipping zone panel.
Set Up Shipping Classes
1. Go to WooCommerce >> Shipping >> Shipping classes and click on Add shipping class.

2. Then, add the name of your shipping class, the slug (which can be the same as the name), and a description for your reference. In the example, we have used overnight shipping, but you can also use names of specific product or other descriptors.

3. You can add as many classes as you want to and click Save Shipping classes.
4. Next, go back to WooCommerce >> Shipping >> Shipping Zones and select the shipping zone you want to configure.
5. In the window displayed, click on the shipping method to view the newly added shipping class options.
6. Add the amount you want to be added to the flat rate shipping rate, in the field next to your shipping class name. You can also use the formulas mentioned above. In this example, customers will be charged an additional $20 on top of the $5 flat rate shipping.
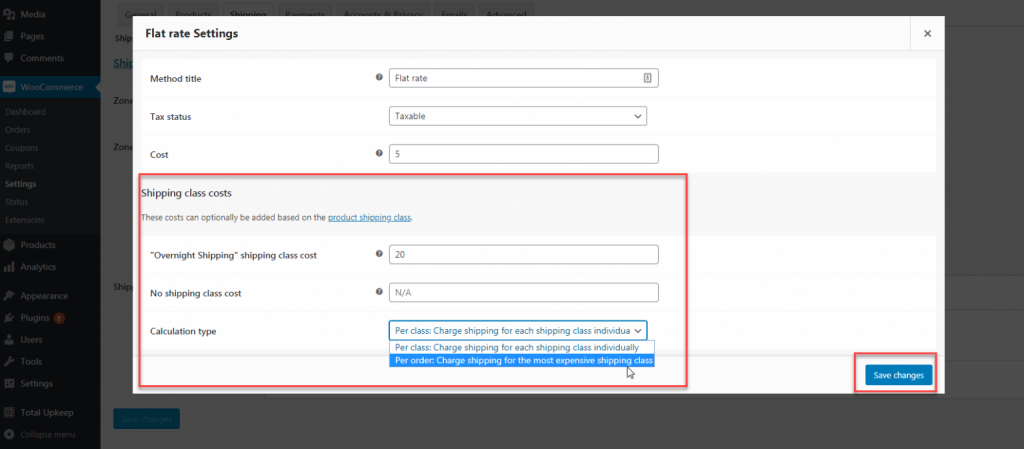
7. In the Calculation type field, select between Per Class: Shipping class that decides shipping cost and Per Order: The most expensive item in the order decides shipping cost.
8. In case you select Per Class, you can add an amount to the field of No shipping class in case you want to add additional fees to the items that don’t have a shipping class. But based on your shipping plan, it can be more expensive for your customers and so we don’t recommend this.
9. Click on Save changes.
Add Shipping Classes to Products
After you create your shipping classes, add the classes to the appropriate products. This can be done by:
1. Go to Products in your dashboard.
2. Click on the product for which you want to assign a shipping class.
3. Navigate below to Product data >> Shipping.
4. Select the proper shipping class from the Shipping class drop-down field.
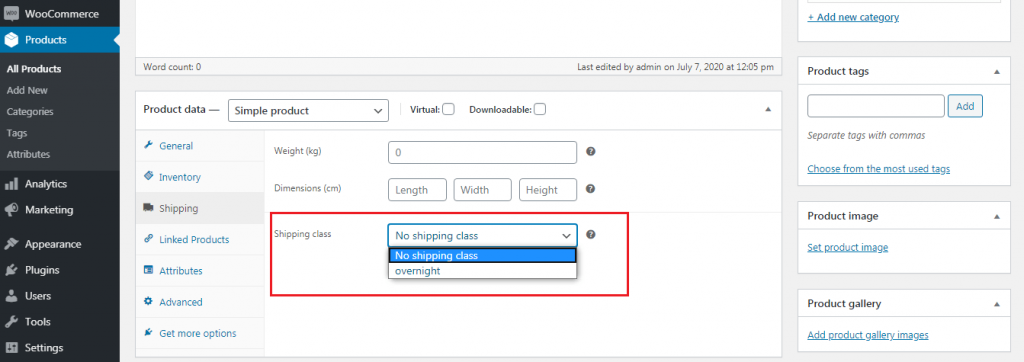
5. Click on Update to save the changes.
Congratulations! You have learned to set up shipping in your WooCommerce store.


