It is possible to move files in your MilesWeb account using an FTP program, but if you want to have a web-based alternative, there is a File Manager built into cPanel.
1. For accessing the File Manager, log in to your cPanel.
2. Navigate to the Files section and click on the File Manager icon.
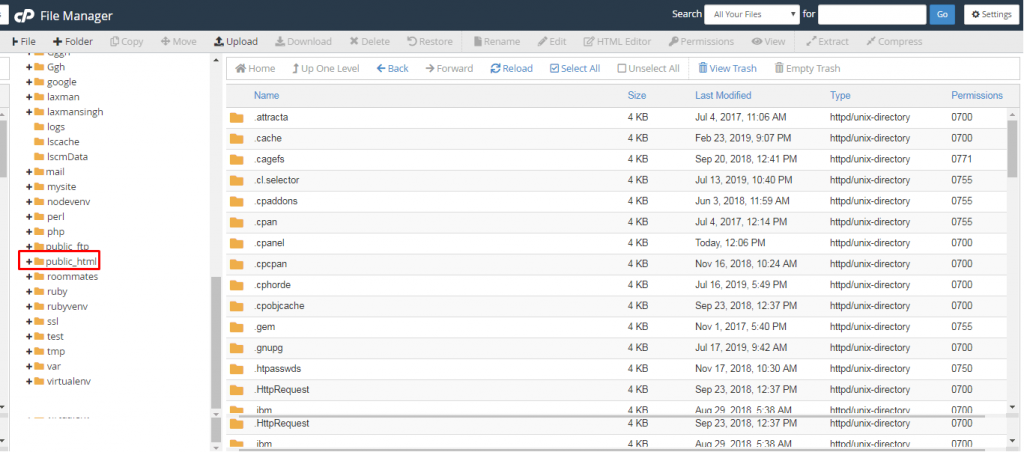
3. After logging in to the File Manager, you will enter in the root directory for your account. Many times, you’ll be working with website files that are located in the “public_html” directory.
Steps to Move a File Using the cPanel File Manager
You can move a file using the cPanel File Manager in two ways.
1. The first option is dragging and dropping the file which is easiest one. Just left click and hold on the file name on the right, and drag it to the new directory on the left.
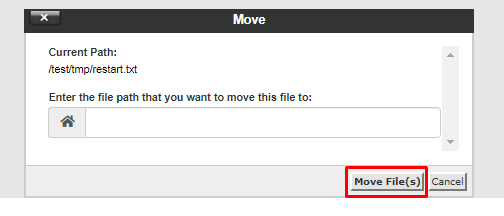
2. Another way is by using the “Move” button. But you should know the path to the location where you want to place the file for using this method. Select the file you want to move and click the “Move” button.
4. Then enter the path to the location where you want to place the file and click the “Move File(s)” button.
That’s it! In this way you have learned to move a file using the cPanel File Manager.


