
Watch this video for a step by step process on how to Update the WordPress Memory Limit from cPanel
Have you ever encountered errors like “Allowed memory size exhausted” while working on the WordPress website? What does it mean? It means that your website has hit the default PHP memory limit set by your web hosting server. WordPress relies on PHP to function, and when your website grows through plugins, themes, or content, it requires more memory to function smoothly.
Luckily, if your website is hosted on a cPanel-based server, increasing the WordPress memory limit is easier. With minor simple changes, you easily allocate more memory to the website and eliminate performance issues or errors caused by low PHP limits. In this guide, we’ll show you exactly how to increase the memory limit using cPanel tools, without needing advanced coding knowledge.
To Change/Increase WordPress Memory Limit:
1. Log in to your cPanel account.
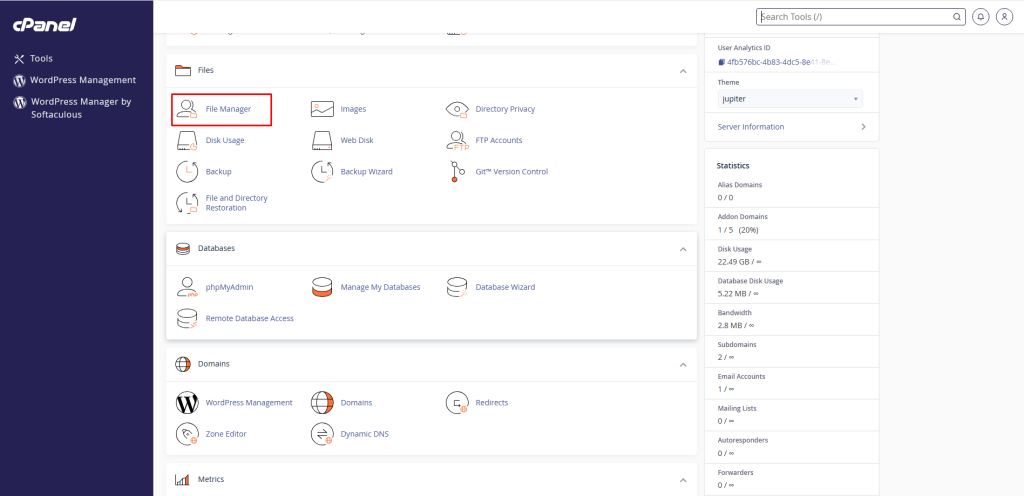
2. Go to the Files section and click on File Manager.
3. In File Manager, browse to your domain’s root folder(which is generally public_html for the main domain and addondomain.tld for the addon domains). Choose the wp-config.php file and click the Edit button.
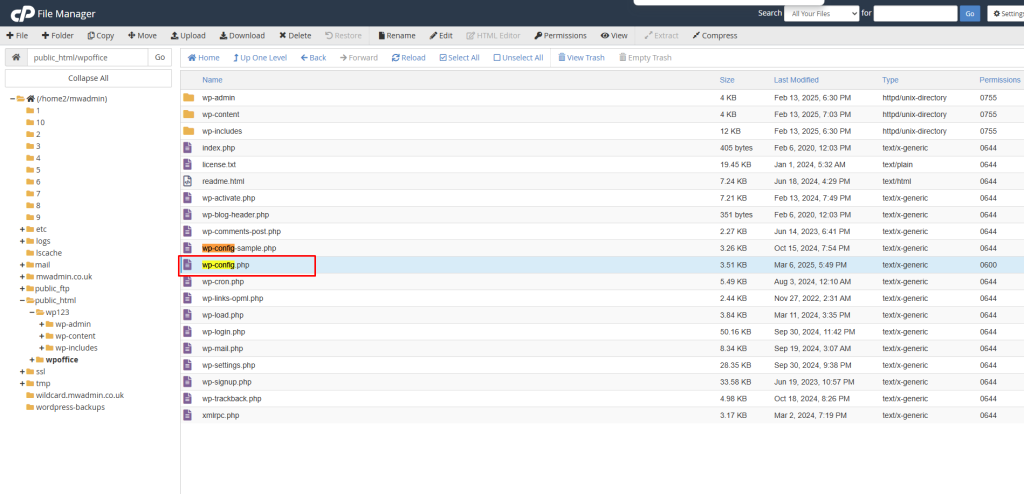
4. A pop-up window will open, prompting you to select the encoding of the file. Click on Edit.

5. The editing window will open. Add the following code:
define( ‘WP_MEMORY_LIMIT’, ‘256M’ );
before the
/* That’s all, stop editing! Happy blogging. */
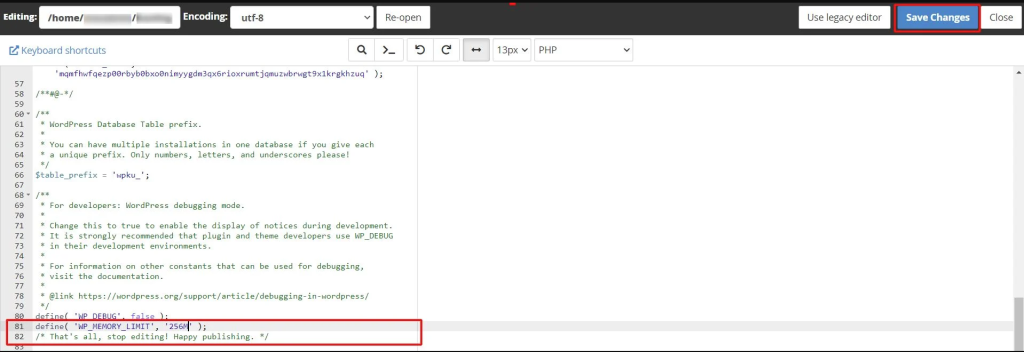
You can assign any memory limit of your preference to replace ‘256M‘ and click on Save Changes.
A success message will flash, meaning the memory limit for WordPress is set.
Running a WordPress site shouldn’t mean dealing with frustrating memory errors or performance bottlenecks. By simply increasing the memory limit via cPanel, you’re giving your website the room it needs to operate efficiently—especially as you install more plugins or experience higher traffic.
This small but crucial change can make a noticeable difference in your site’s reliability and user experience. Whether you’re managing a blog, online store, or business site, learning how to update the WordPress memory limit from cPanel is a smart step toward better site management and stability.


