Watch this video for a step by step process of importing and exporting the MySQL database with phpMyAdmin
Importing and exporting your database is a significant skill which you need to have. Data dumps can be used for backup and restoration purposes so that older copies of your database can be recovered during emergency or those can be used to migrate data to a new server or development environment.
Database dumps in MySQL can be managed in a simple way. phpMyAdmin makes it easy and more efficient to manage the MySQL databases and also enables you to manage those available databases from any location. The ability of phpMyAdmin to import and export databases also helps to recover from any disaster and migrate a database from one server to another. Also, as the import and export process occurs through a database, you don’t need to sit in front of the server for recovering your database.
You can export and import your database in the below formats with phpMyAdmin:
- SQL
- CVS
- CodeGen
- CVS for Microsoft Excel
- Microsoft Word 2000
- JSON
- LaTeX
- MediaWiki Table
- OpenDocument Spreadsheet
- OpenDocument Text
- PHP Array
- Texy! Text
- YAML
How to Export Your MySQL Database using phpMyAdmin?
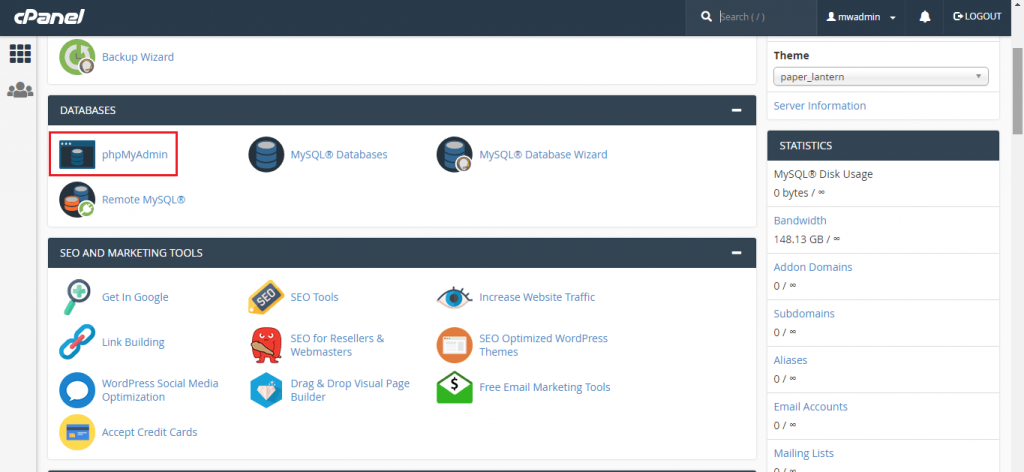
- Login to your cPanel account and click on phpMyAdmin icon under the Databases.
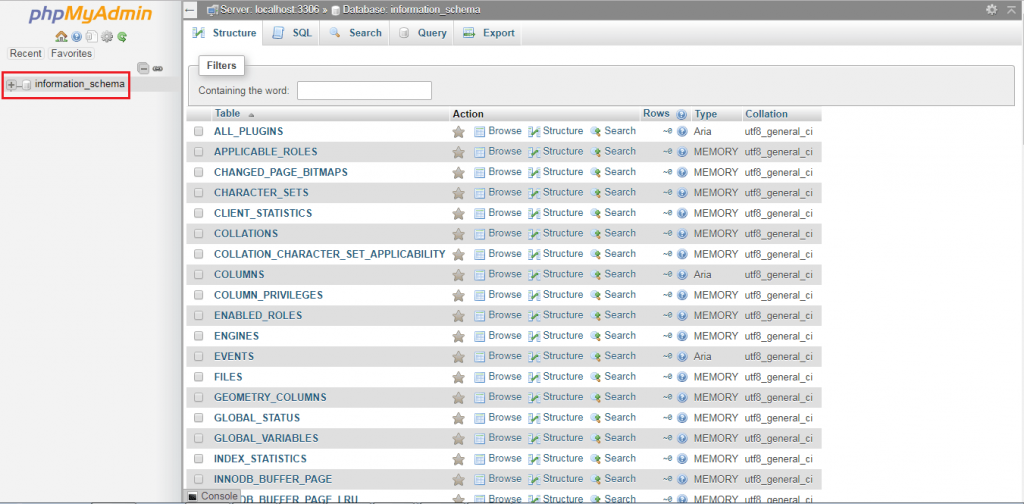
- On the left-side, click on the database you working with.
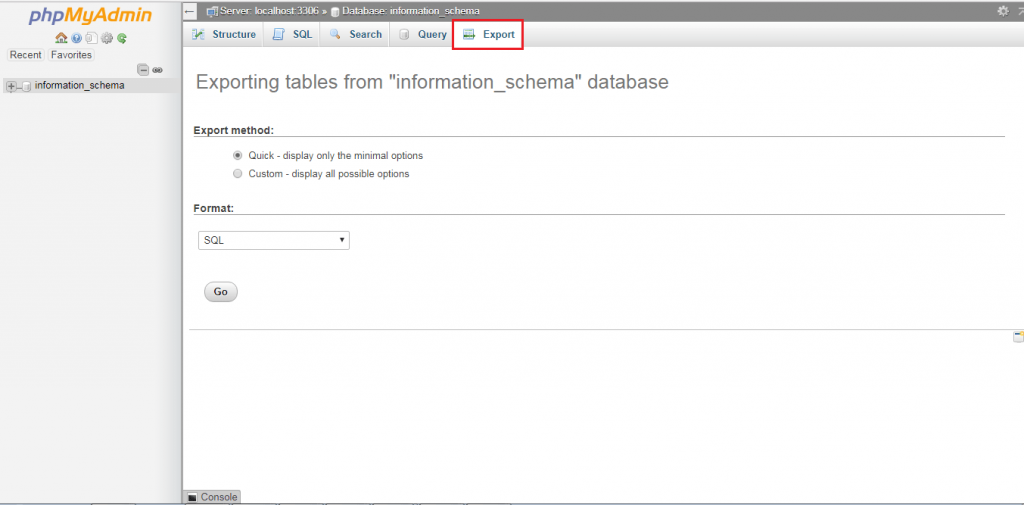
- Next, click on the Export tab at the top.
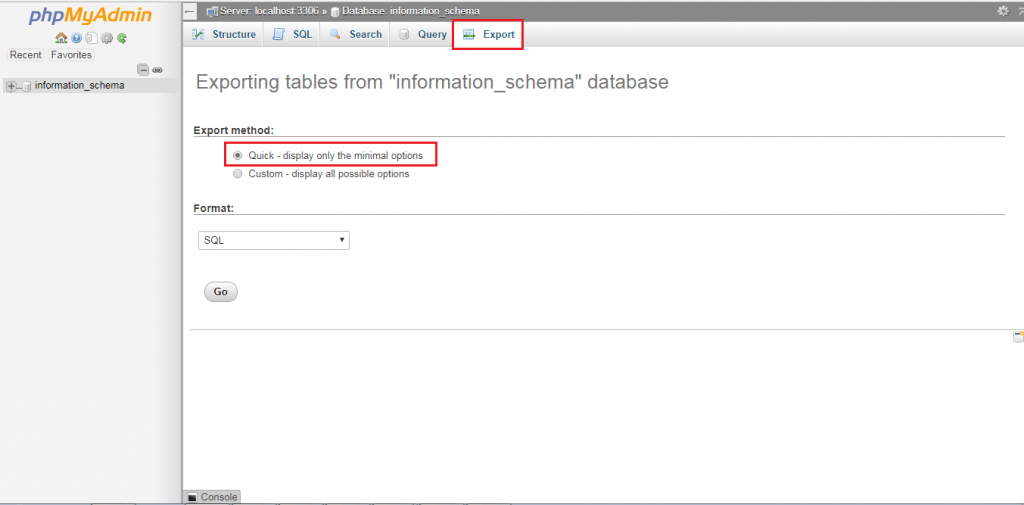
- You will see two options – Quick and Custom. Since we are providing you information on quick export, please click on Quick – display only minimal options. For Custom method, you need to have complete knowledge of exporting MySQL databases.
- After this, you will need to choose the format in which you want your database to be exported. So, select the one from the list below.
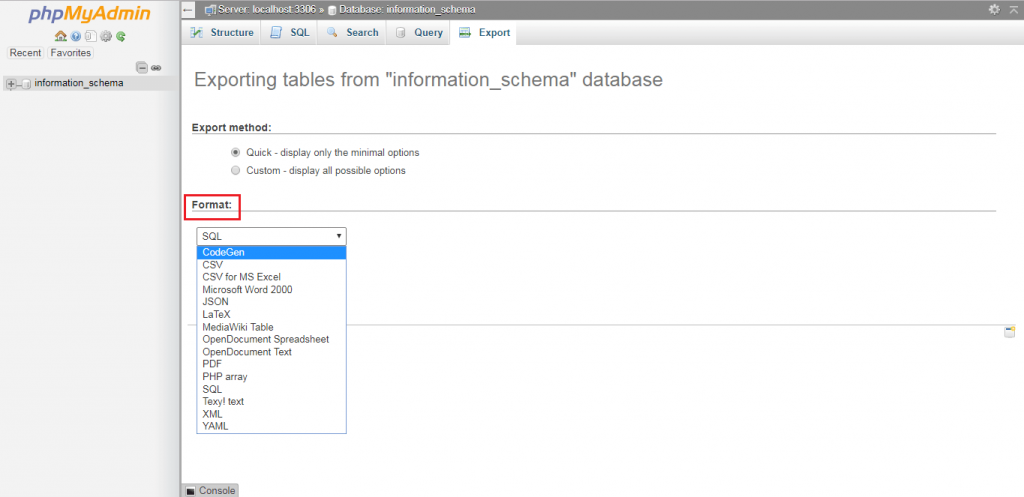
- Next, click on Go.
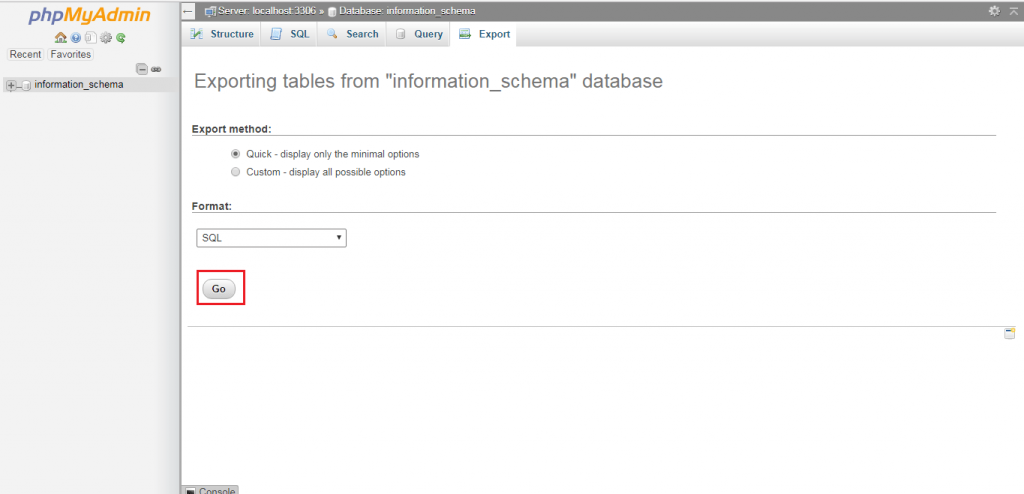
- You will be asked to either open or save the file. Here, you need to select save the file and save it to somewhere you will remember.
That’s all! You are done with exporting the copy of your database.
How to Import Your MySQL Database using phpMyAdmin?
- Login to your cPanel account and click on phpMyAdmin icon.

- Select the database you want to work with from the left-side.

- Click on Browse under the File to Import section and select the backup file you have created.
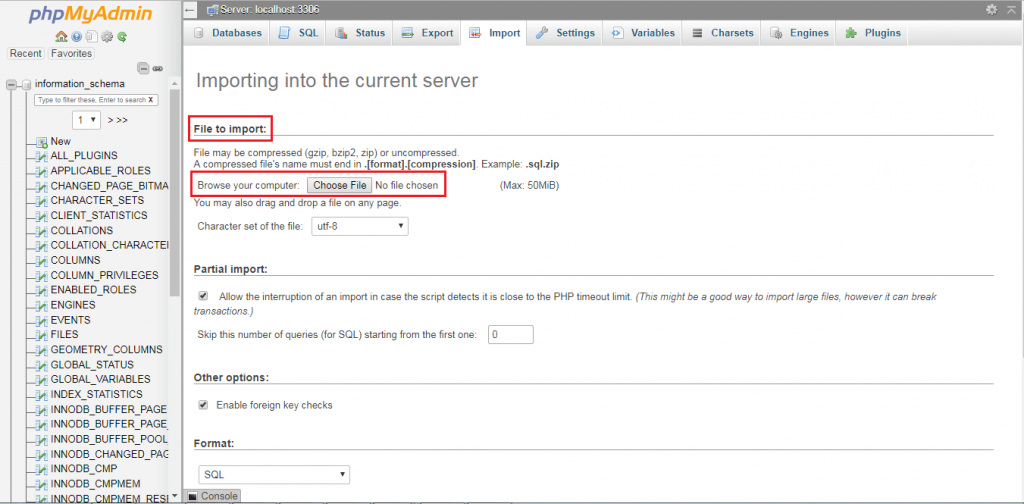
- Next, select the format in which you want to import the database.
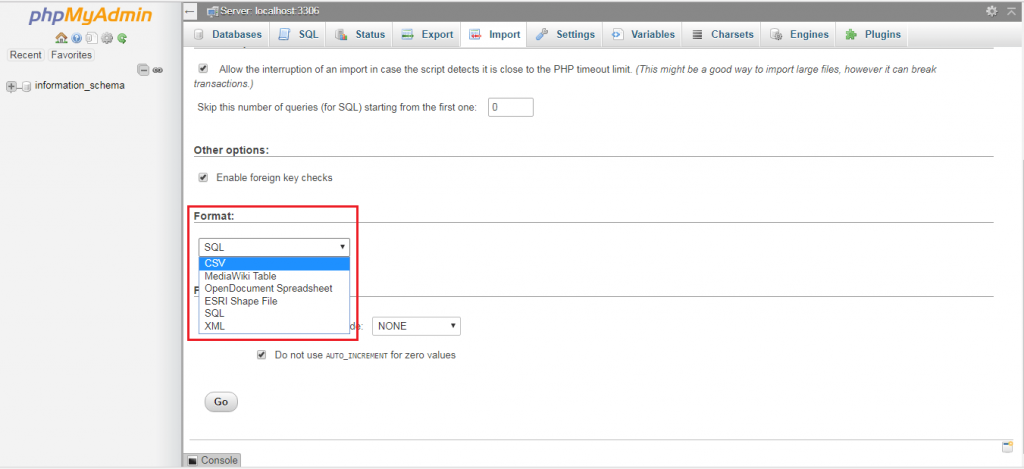
- Then click on Go at the bottom left.
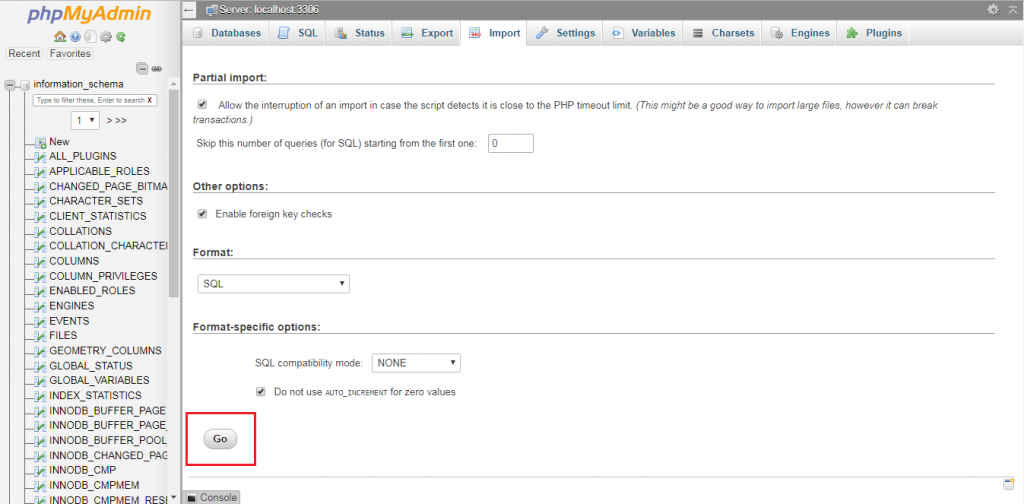
- After the database is imported successfully, you will see a message at the top of the page as: Import has been successfully finished, ## queries executed.
Congratulations! You have successfully completed the process of exporting and importing the MySQL database using phpMyAdmin.


