Use of Public and Private Key while logging into SSH provides security and added convenience. These keys can be used in place of a password so that no username or password is required to connect to the server via SSH. You can also generate keys with a different password from your cPanel password if required.
# Following are the Steps to generate a Public/ Private Key Pair
1. Log in to cPanel and click on the SSH/Shell Access icon under the Security category.
2. Now open Manage SSH Keys tool.
3. Click on Generate a New Key and complete the fields that are shown. For maximum security try using RSA key type and a 4096-bit key size.
4. The location for the newly generated public and private key will be displayed as well as the key fingerprint.
5. Click on Go Back.
6. Click on Manage Authorization present next to the Public key you have generated. Then click on Authorize to activate your public key.
7. Click on Go Back.
8. Click on View/Download located to the right of the Private Key. Click on the Download Key button. Now Save the file to your computer and click on Go back.
Now, you can use the private key saved on your computer to securely log in with SSH to our server. If you are already using PuTTY then refer following steps for the configuration :
# Steps to Generate a ppk file
1. Download PuTTYgen from PuTTY Download Page and open it.
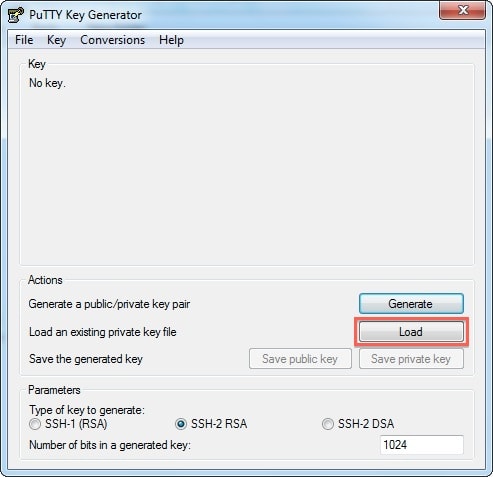
2. Click on Load
3. Identify and locate the private SSH key that you have downloaded.
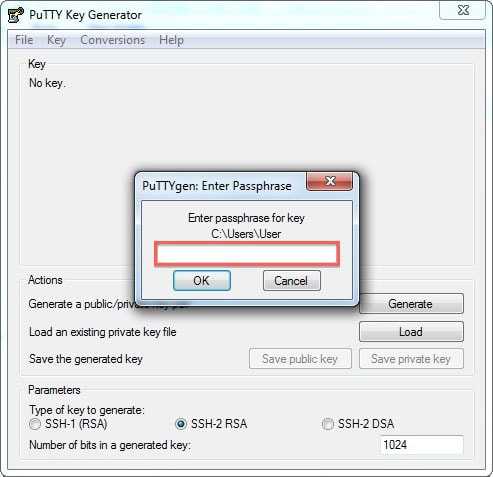
4. Enter your password for SSH Key
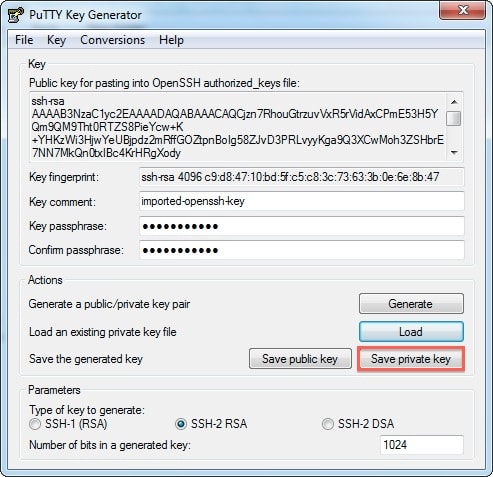
5. Click on the Save private key button to create the ppk file.
# Steps to Configure PuTTY
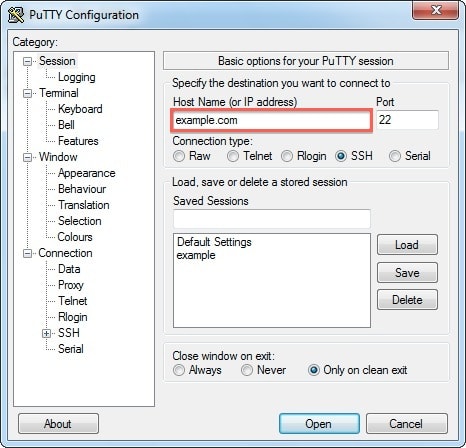
1. On PuTTY configuration under Basic options for your PuTTY session enter your Host Name.
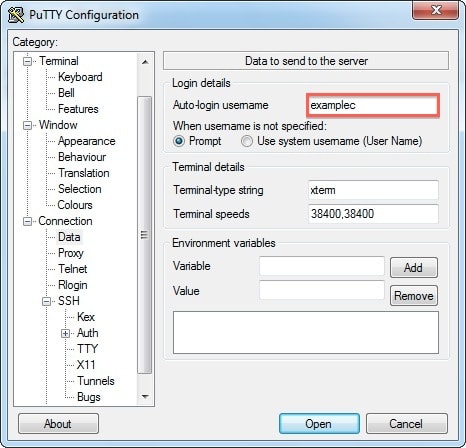
2. In the category on the right side of the panel, go to Connection under it select Data.
3. Now, in the text box for Auto-login username enter your cPanel username.
4. Under the SSH section, choose 2 from Preferred SSH Protocol Version
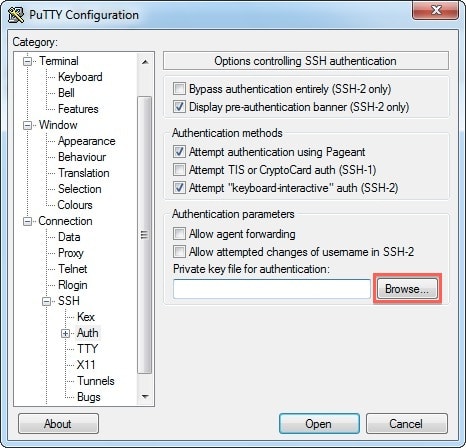
5. Under SSH-> Auth specify the location where you want your private key to be found.
6. Click on Browse to identify and locate the file of your computer.
7. Under Sessions, enter the name (example “my site”) in the Saved Session box and click on Save.
That’s it!
Also Read :


