Watch this video for a step by step process on how to Set up G Suite MX records in Plesk
Steps to Set up G Suite MX records in Plesk:
- Log in to Plesk.
- Click on DNS
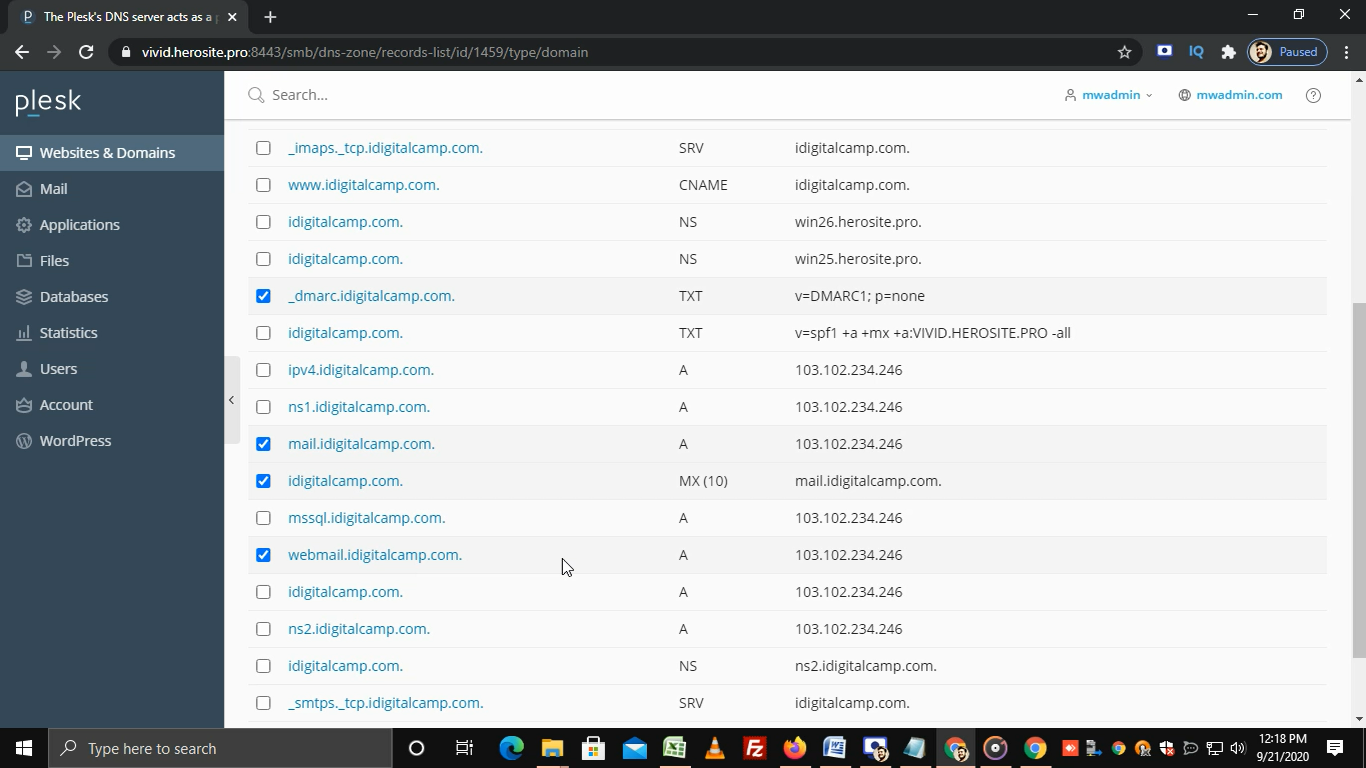
- Select these checkboxes to remove existing records.

- Note: The most important record to remove is the MX record. But to avoid conflicts, the DMARC TXT, SPF TXT (if any) and A records for mail and webmail should also be removed.
- Click on Remove.
Steps to add new MX records:
To direct your email to your G Suite account, you have to add these MX records to your domain.
- In the same dashboard, click on Add Record.
- From the Record Type list, select MX.
- Leave the Mail Domain field empty.
- In the Mail exchange server field, enter this record (ASPMX.L.GOOGLE.COM)
- In Specify the priority of the mail exchange server list, select the priority as 1 for this record.
- Click on OK.
- Repeat the same procedure to add remaining MX records with their respective Priority.
- After adding all the MX records, click on Update.
- You will get a success message.
- Now you can activate G suite from the Google admin panel.
In this way, you can set up G Suite MX records in Plesk.


