
Changing a domain name in MilesWeb’s client area is a straightforward process. However, it is essential to remember that changing the domain name of your hosting account simply means you are updating the primary domain name of the specific web hosting account. This guide walks you through the step-by-step procedure to update your domain name efficiently.
Steps to Change Your Domain Name in MilesWeb’s Client Area
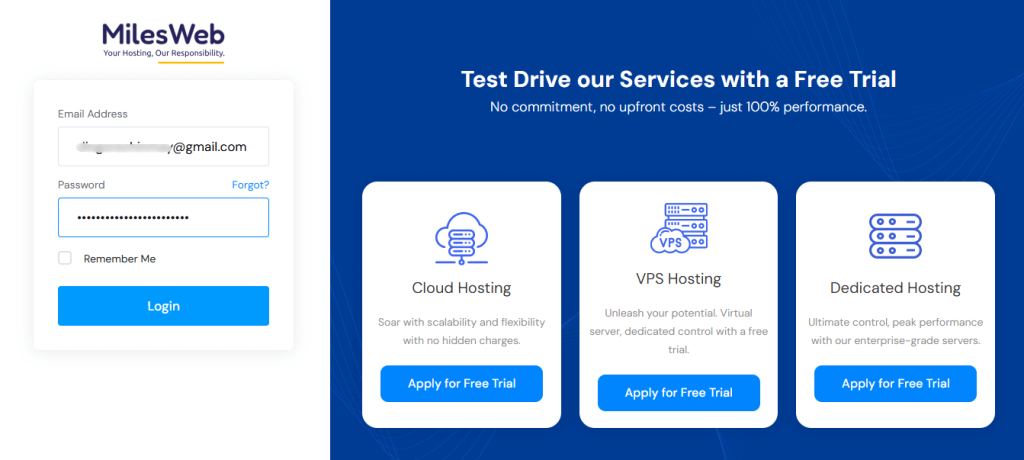
Step 1: Access MilesWeb’s Client Area
- Open your browser and go to my.milesweb.com.
- You will be redirected to the client area login page.
- Enter your registered email address and password, then click on Login.
Step 2: Navigate to Your Active Products/Services
- Once logged in, you will see the client area dashboard.
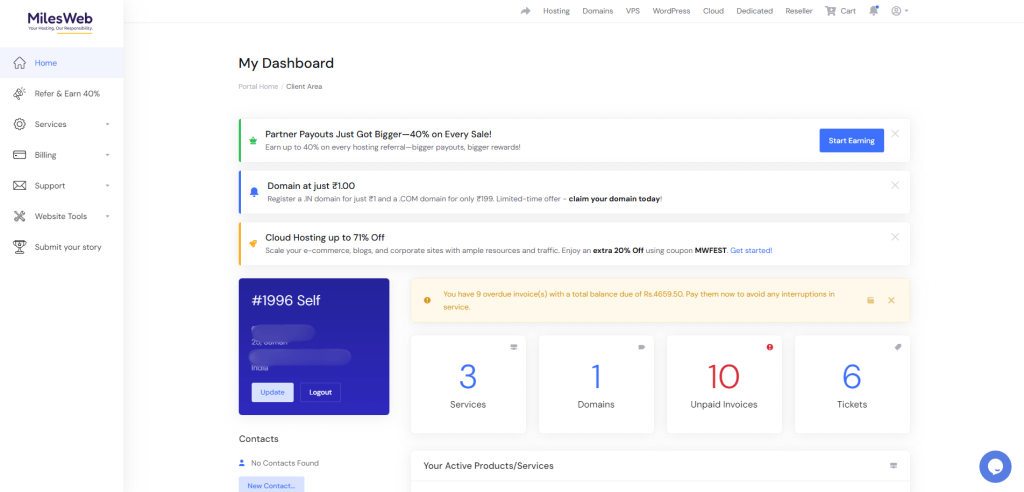
- Scroll down to find the Your Active Products/Services section.
- Here, you’ll find a list of all your active hosting services and domains.
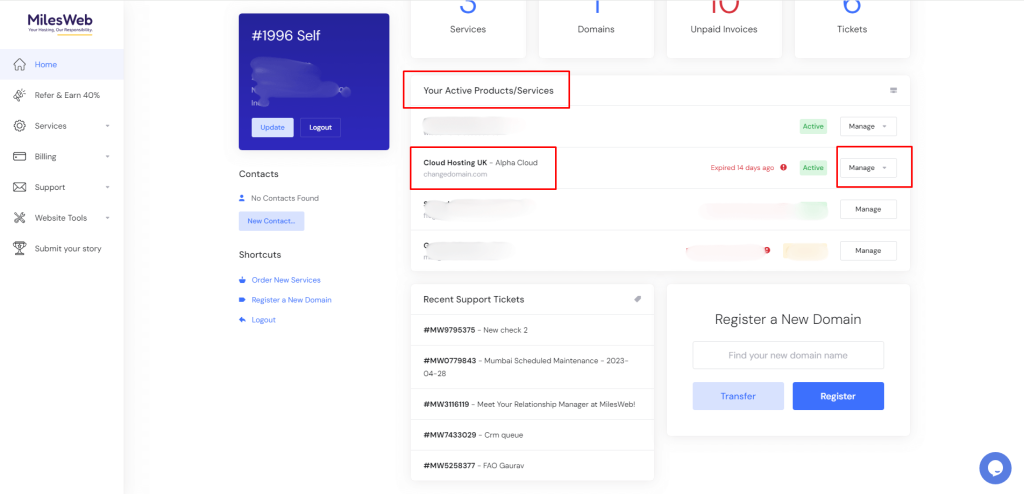
Step 3: Select the Domain You Want to Change
- Locate the hosting plan associated with the domain you wish to change.
- Click on the Manage button next to the selected domain.
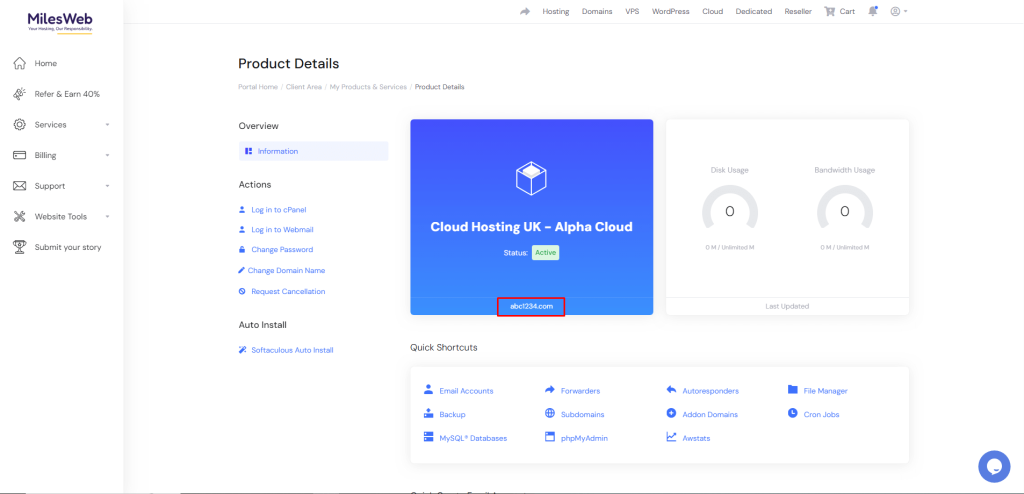
Step 4: Open the Change Domain Name Option
- After clicking Manage, you will be taken to the Product Details page.
- Under the Actions section, look for the Change Domain Name option.
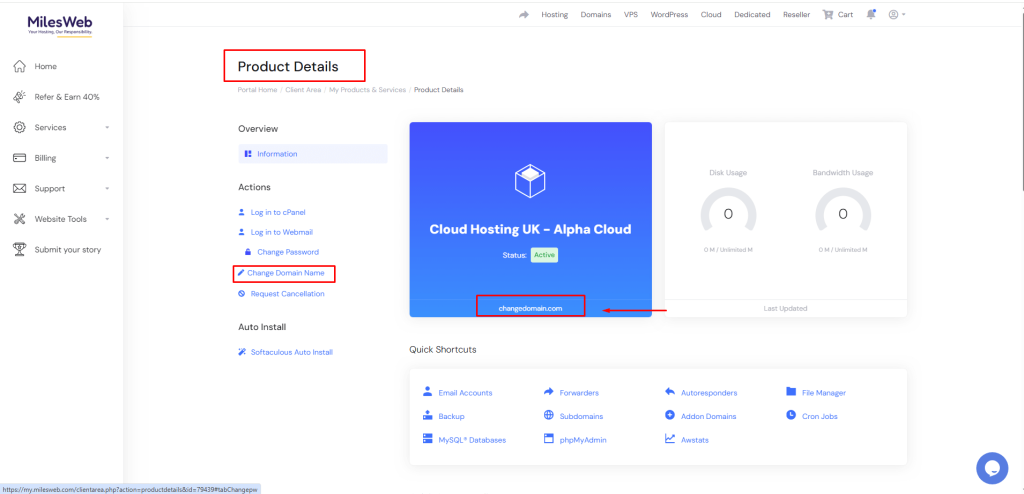
- Click on Change Domain Name to proceed.
Step 5: Enter the New Domain Name
- A new window will appear asking you to enter the new domain name.
- Carefully type the new domain name and follow any instructions displayed on the screen.
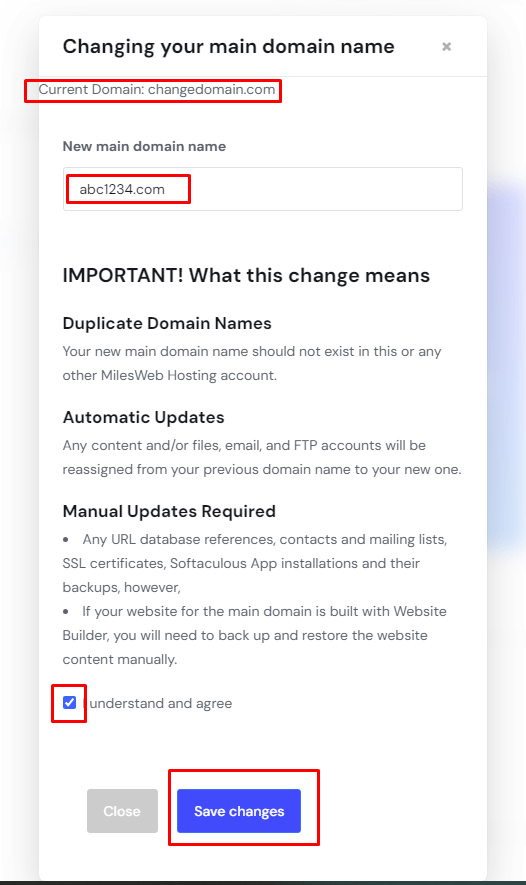
Step 6: Confirm the Domain Change
- Check the details you have entered. It shows your current domain name and your preferred domain change.
- Tick the checkbox that says “I understand and agree” to confirm the change.
- Click on Save Changes to proceed.
Step 7: Domain Change Confirmation
- Once the process is complete, you will see a popup message stating “Domain changed successfully” and your changed domain will appear as yoru current domain name at the top of the screen.
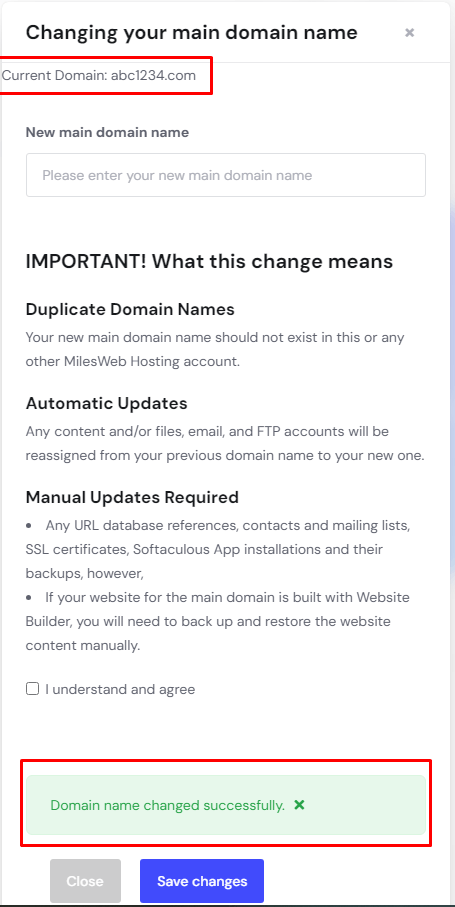
- Close the popup and refresh the page.
You will now see that your domain has been updated successfully in the Product Details section.
Conclusion
Changing a domain name through MilesWeb’s client area is a hassle-free process. If you encounter any issues, MilesWeb’s customer support team is always available to assist you.
Need more guidance? Contact MilesWeb Support for expert assistance!


