When you are designing your website, you might want to add your logo or any image to the header of your website. In this tutorial, we will present easy steps for doing this.
For adding a logo or an image to your website, you will have to modify the HTML or the PHP file where you want the logo to be displayed.
You will have to use an FTP client for connecting to a web server and editing your files. Alternatively, you can also make use of File Manager present in your web hosting control panel.
Here are the steps for adding an image with the use of cPanel in your WordPress website:
- Save the image with an appropriate name i.e. separate the words with hyphens instead of spaces.
- Login to cPanel and go to ‘File Manager‘.

- Search and open the ‘public_html’ folder by clicking on the ‘Go’.
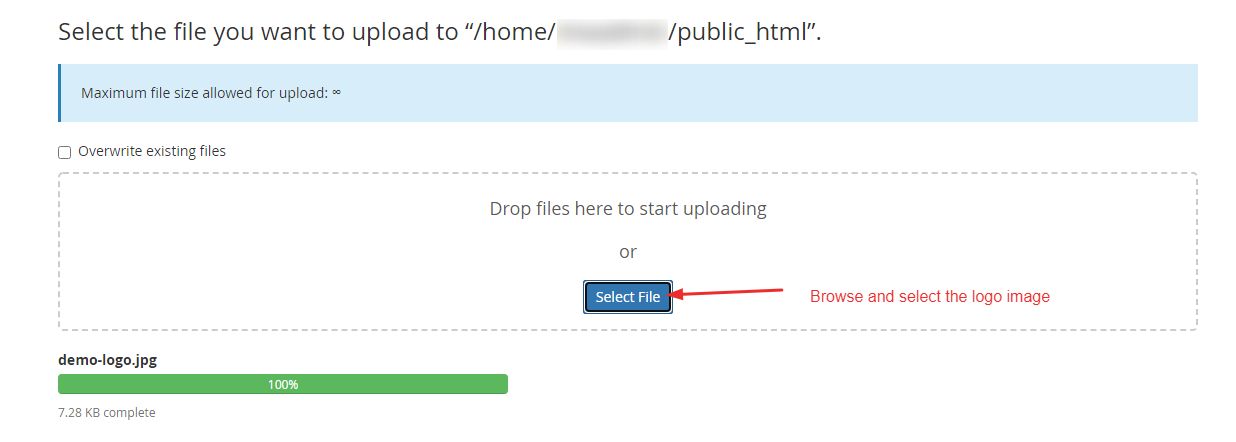
- Click on the Upload button.

- Browse and select the logo’s image file to upload in the ‘public_html’ directory.

Note: The image should have a proper format. We recommend you use png or jpg extensions.
- Go to the directory ‘wp-content’ then go to ‘Themes’ and access the theme folder that you are using currently.
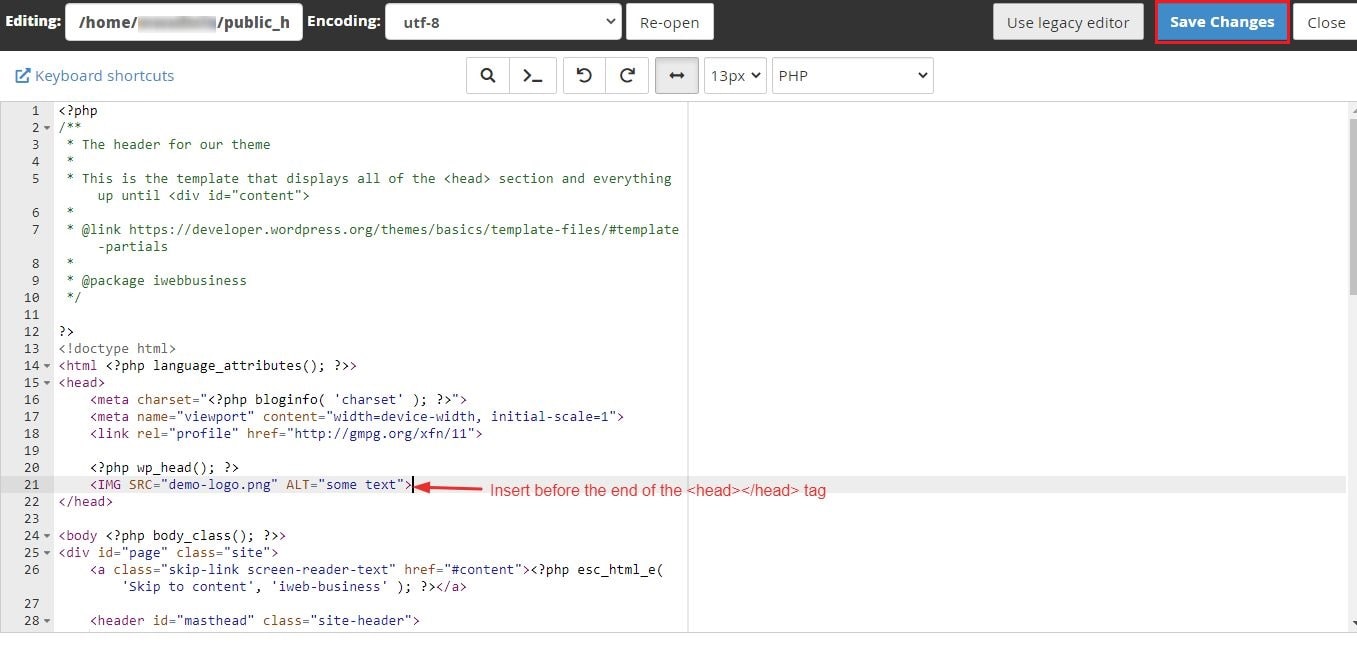
- Open the file where you want the logo or image to be displayed. If you wish to add the image to the header, you have to access the ‘header.php’ file.

- Add the image by inserting the HTML syntax mentioned below. Make sure to place it prior to the end of the <head></head> tag in the header.php file.
<IMG SRC="demo-logo.jpg" ALT="some text">
- Once you click Save Changes, reload your website.

- The image will now be displayed on the header of your website.


