When new packages are created for your cPanel accounts within WHM, a feature list needs to be assigned to that specific page. A Feature List as the name suggests is a list of features that each cPanel account includes.
For example, the below is a list of features you can enable/disable for your user:
- phpMyAdmin
- Awstats
- File Manager
- IP Deny Manager
Steps to Create a Feature List
1. Login to your WHM account.
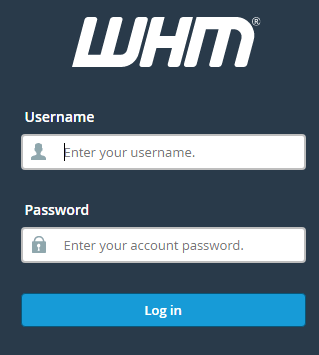
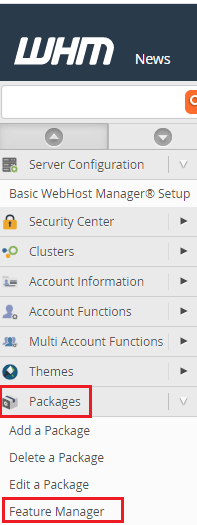
2. Go to Packages in the left menu and click on Feature Manager.
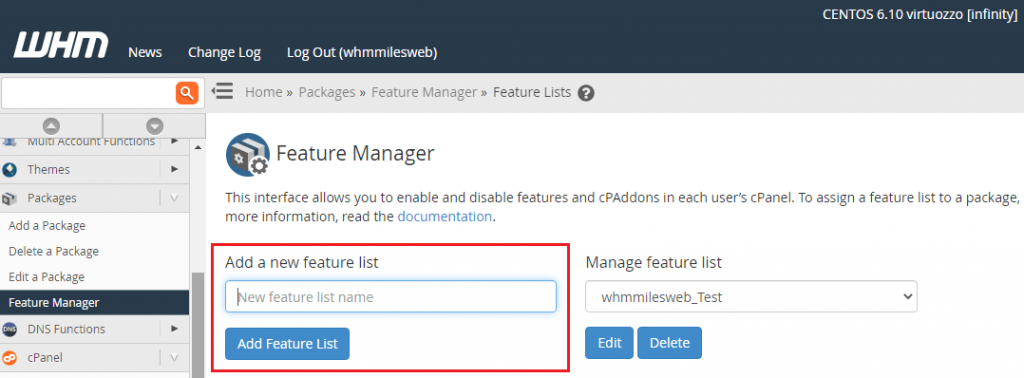
3. Enter a new feature list name under Add a New Feature List and click on Add.
4. A new window with the list of features will get displayed. Select/deselect the features mentioned in the list that you want to enable/disable for your cPanel account.
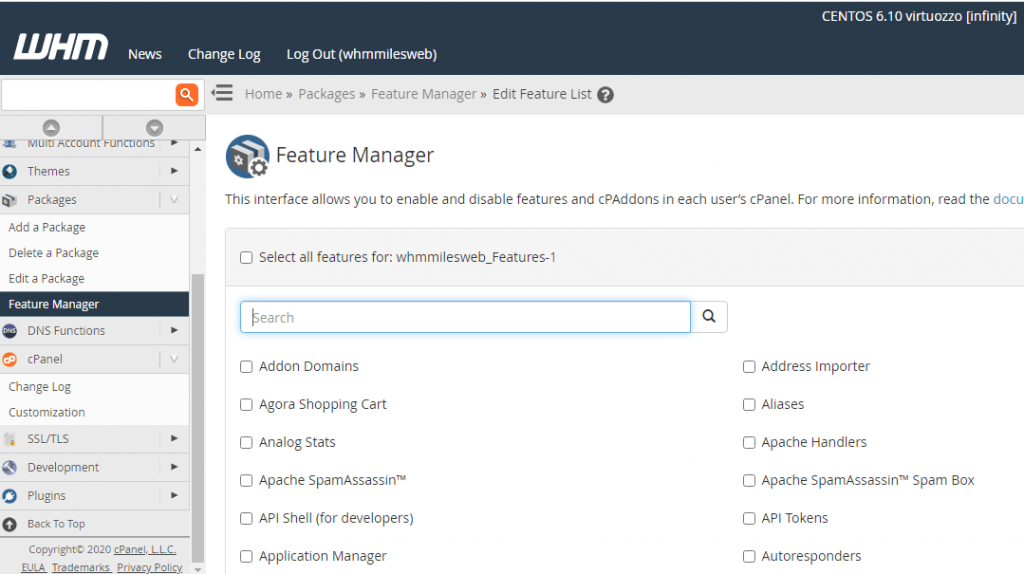
5. Once done, click on Save at the bottom to save the list of features.
Steps to Assign a Feature List to a cPanel Account
Feature Lists are allocated to Packages. For assigning a Feature List to a cPanel account, it is needed to first assign a feature list to a package, and assign the package to the cPanel account.
1. Login to your WHM account
2. Go to Packages in the left menu and click on Edit a Package under it.
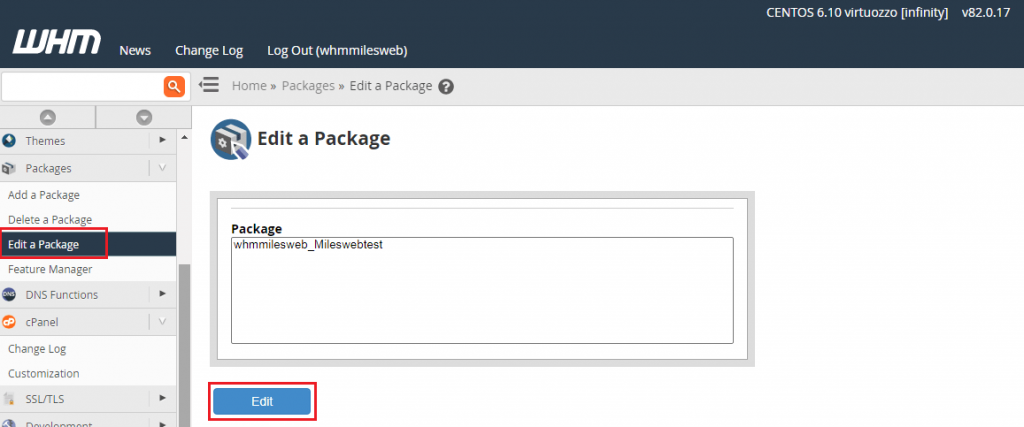
3. Select the package you want to modify and click on Edit.
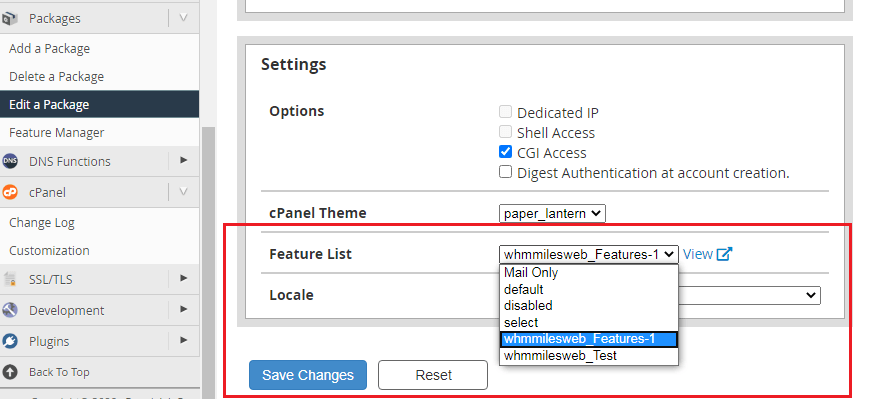
4. Scroll down to the bottom and click on the Feature List drop-down under Settings. Select the feature list you want to assign and click on Save Changes.
Steps to Change the Package Associated with a cPanel Account
1. Login to your WHM account.
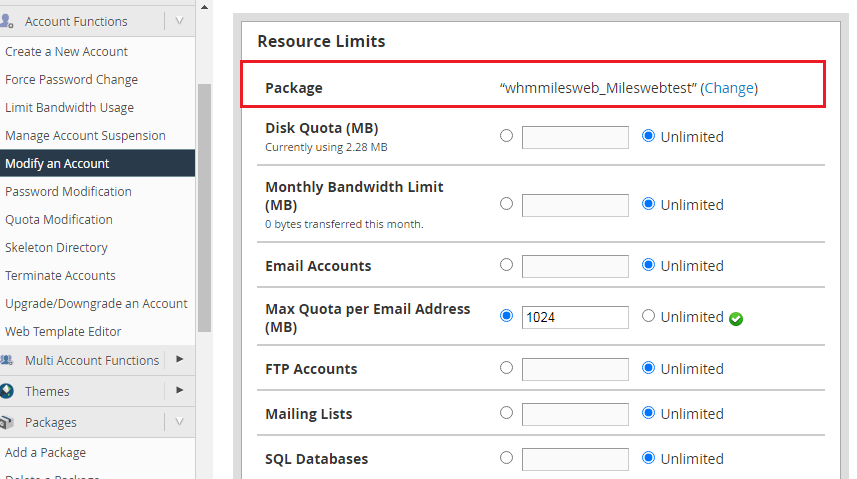
2. In the left menu under Account Functions, click on Modify an Account.
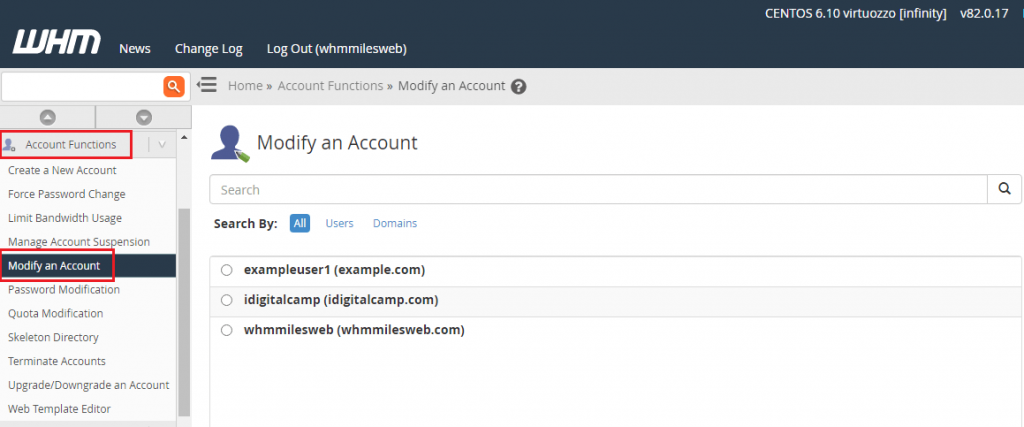
3. Select the package that you want to make changes and click on Modify.
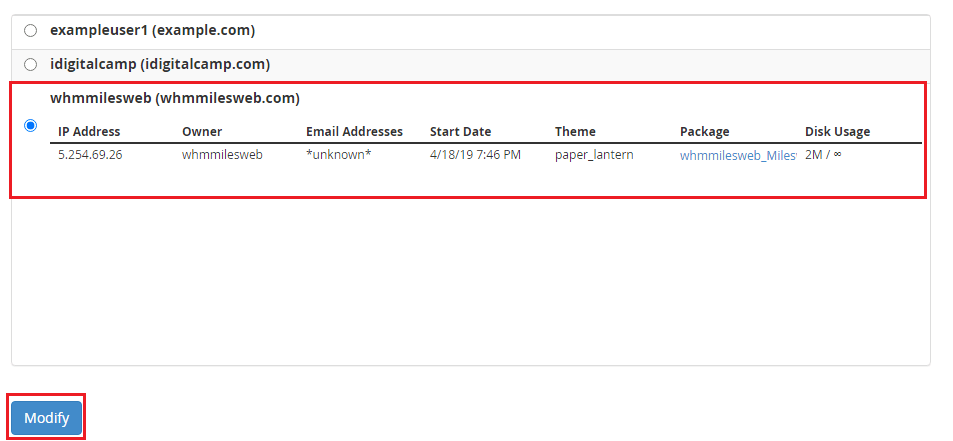
4. Scroll down to Resource Limits and click on Change besides your Package name.
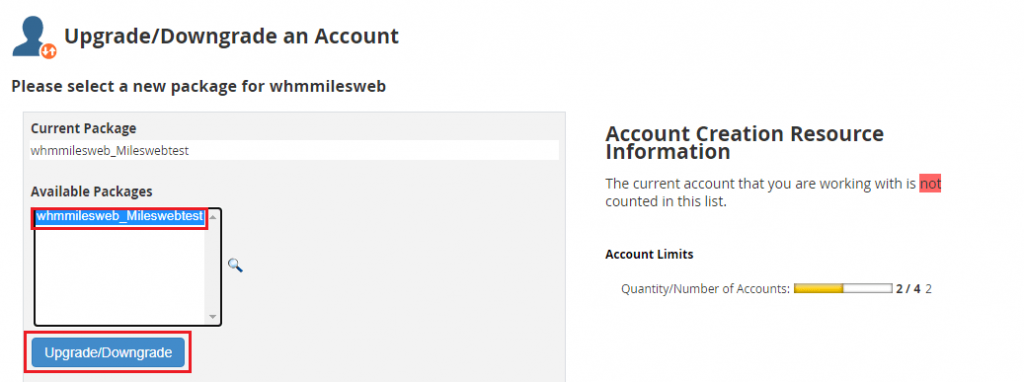
5. Choose the new package from the list and click on Upgrade/Downgrade.
That’s it! You have learned to work with Feature List in WHM.


