Watch this video for a step by step process on how to Create Email Forwarder in Webmail
Email forwarders will redirect any emails that one email address receives to a designated email address of your choice. It is a helpful technique for entrepreneurs and business owners as it allows one to collect all emails to a single account.
Note: The Email forwarders of an account can redirect or forward emails to a single email account. It is possible to create multiple forwarders, but you have to do it manually for each account.
To Create Email Forwarder in Webmail
1. Log in to your WebMail account.
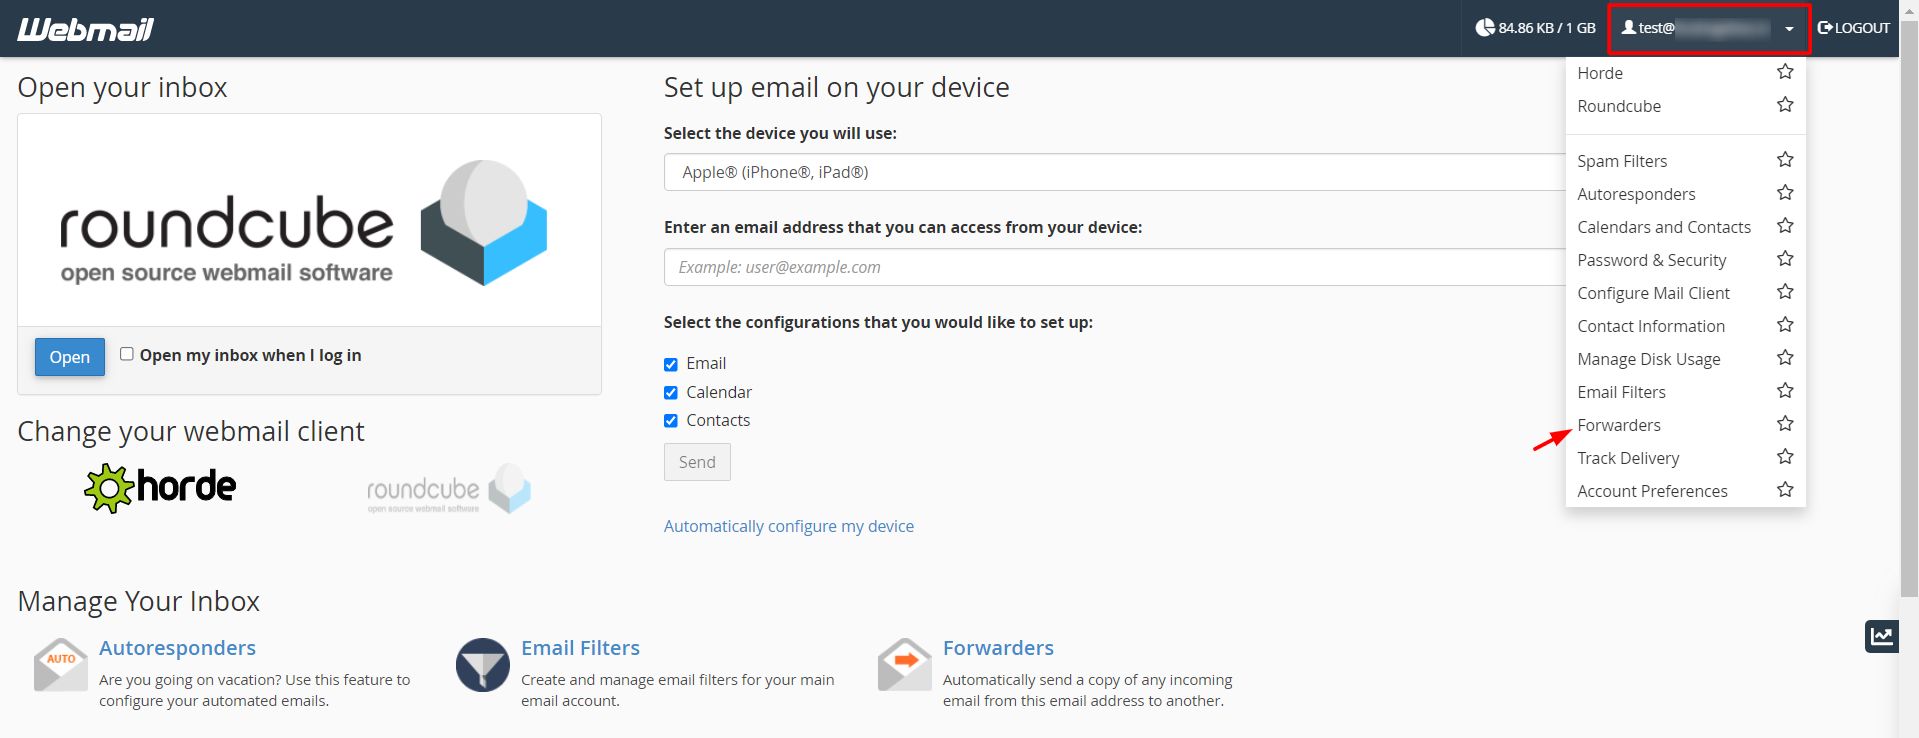
2. Click your WebMail account. As shown below, a dropdown list will appear. Click on the Forwarders option.

3. Click the Add Forwarder button.

4. Enter the email address to receive the forwarded emails in the Forward to Email Address field. Click the Add Forwarder button.

A success message will flash on-screen, showing that the forwarder is successfully added to the list. You can confirm the same by checking the list of Email Account Forwarders.

Note: Please make sure that the email address of the forwarder is absolutely correct. If you enter an incorrect email address as a forwarder, the wrong address will receive these forwarded emails and not you.


