
Watch this video for a step by step process to create email accounts from cPanel
With your cPanel account, setting up personalized email addresses for your domain is quick and easy. You can create multiple email accounts, set strong passwords, and assign mailbox storage limits based on your needs. Plus, managing all your email accounts from one place becomes super convenient.
In this guide, we’ll walk you through the simple steps to create a new email account for your domain using cPanel. Just follow the instructions below and get started in no time!
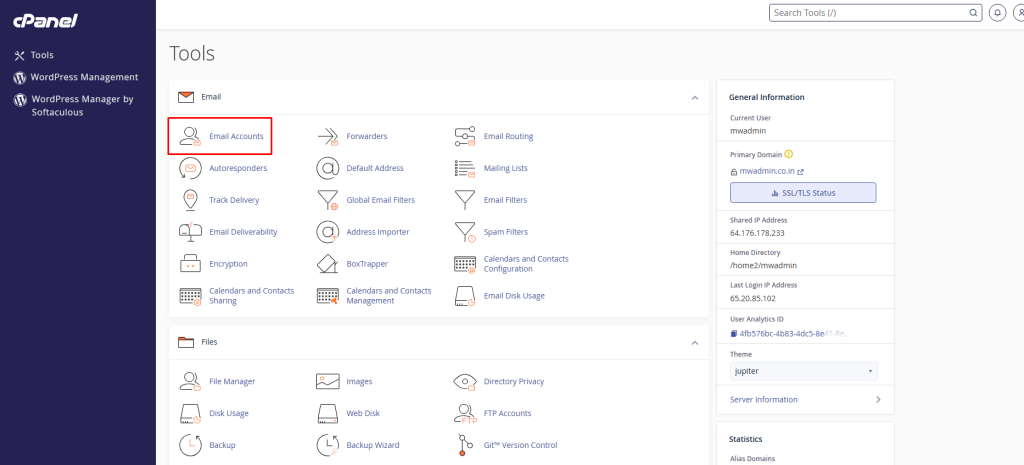
1. First, login to your cPanel ->Email section -> Email Accounts menu.
2. Select the domain you want your email account to be associated with, and enter the Email and Password of your choice.
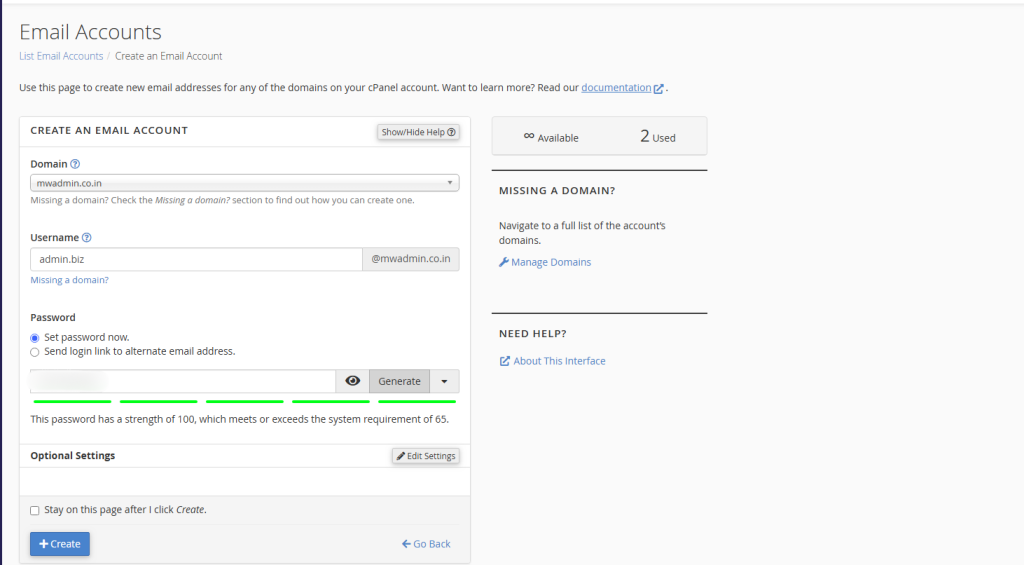
3. Click on Create Account button once you fill up all fields with required data.

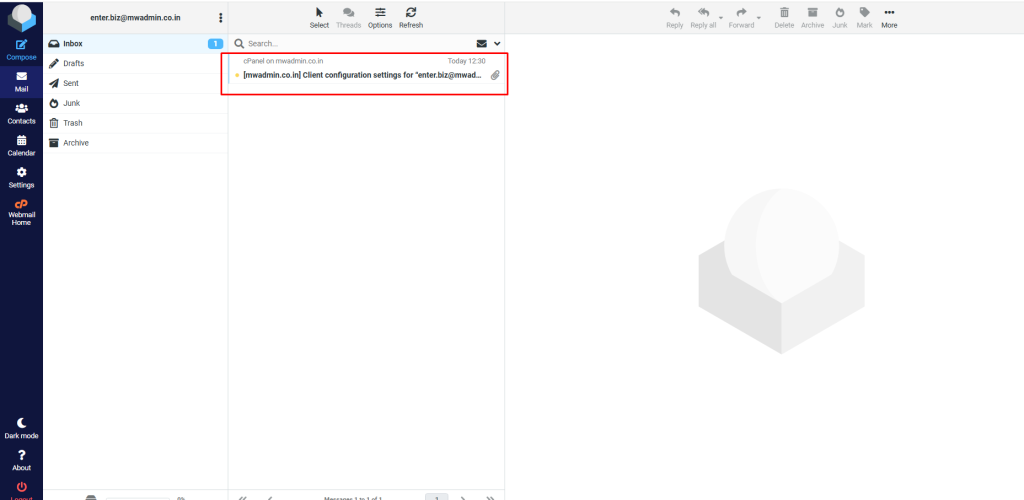
4. To login to Webmail, click on more next to the email account in question > Check Email.
5. You will be navigating to the Roundcube to access the Webmail.
If you have any trouble while creating an email account in cPanel, contact us at, support@milesweb.com.
Creating cPanel email account is a simple yet powerful way to establish a professional communication channel for your domain. Whether you’re setting up emails for your team, business, or personal use, cPanel gives you full control—letting you manage passwords, storage quotas, and access with ease.
Now that you know how to create and manage email accounts from cPanel, you can streamline communication, maintain branding consistency, and stay organized. It’s one of the essential tools every website owner should make the most of.


