
Error Description:
I encountered the message “An Active Directory Domain Controller (AD DC) for the domain ‘domainname’ could not be contacted” when attempting to join a new Windows workstation or server to an Active Directory (AD) domain.
This is a common error and can arise from various issues. This blog will guide you through the troubleshooting steps, progressing from basic to advanced solutions for solving simple DNS configuration errors to more complex problems.
What to Do When You Encounter an Error?
The error is displayed during the process of joining a workstation or server to a domain using the following steps:
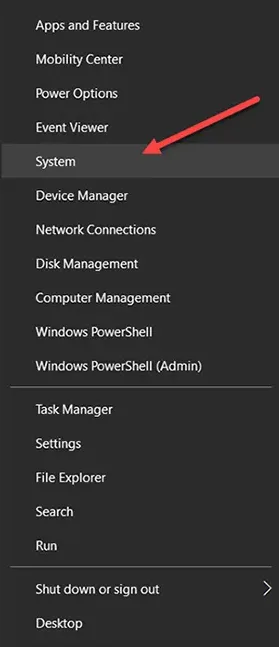
1. Right-click on the Start button and select System.
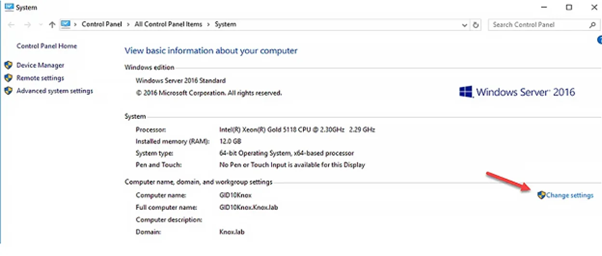
2. Click “Change settings” on the next screen.
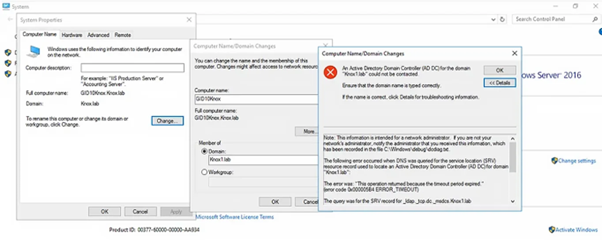
3. In the System Properties window, click the Change button, enter the new computer’s name, specify the domain (using the fully qualified domain name), and click OK. The error may appear at this point.
Troubleshooting The Error
To begin troubleshooting, follow these steps:
Verify the correctness of the typed domain name. Click “Details” to gather information about the error.
The subsequent sections cover the steps to discover the root of the error. In the majority of instances, the error occurs due to inaccurate DNS settings, an incorrect IP address on your system, misconfiguration of DNS on the domain controller (DC) side, or blocked ports present on the firewall.
If you are uncertain about the root cause of the error, I recommend following the troubleshooting options in sequence. As an alternative, if you have additional information or are certain about the cause, you can go straight to the step you believe is most likely to resolve the problem.
Validate the Accuracy of IP Settings
Ensure that your computer’s network interface is working with the correct IP address. You can obtain the IP address from the network adapter settings or from a DHCP server. To retrieve the current network settings of the computer, utilize the following command:
ipconfig /all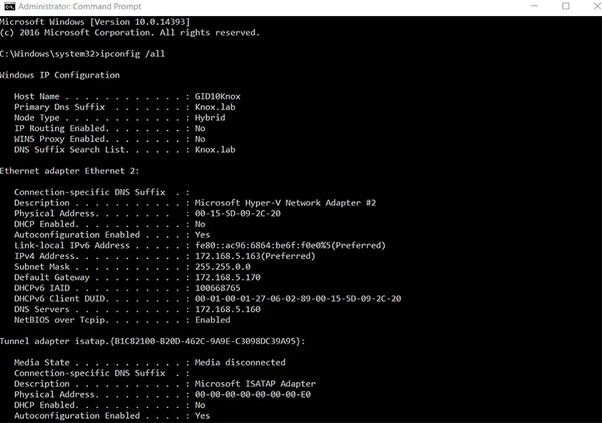
Ensure your DNS Client Service is Running
Verify that the DNS Client Service is working. Additionally, confirm the operational status of the DNS client service by executing the following command:
Get-Service dnscache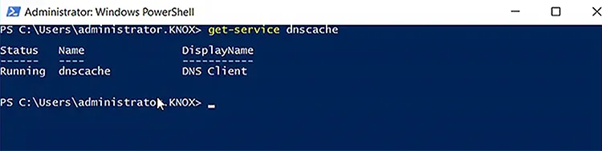
Inspect the Host File for Domain Entries
Check for the presence of domain or domain controller entries in the hosts file located at C:\Windows\System32\Drivers\etc\hosts on the PC. Open the file using Notepad or any text editor. If any entries for your domain or domain controller (DC) names are found, remove them by deleting.
To view the contents of the hosts file on the PC, execute the following command:
get-content C:\Windows\System32\Drivers\etc\hosts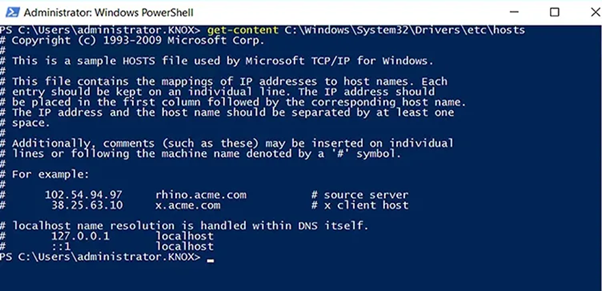
Restart the DNS Cache Service:
Open an elevated command prompt and clear the DNS cache using this command:
ipconfig /flushdnsSubsequently, stop and restart the DNS cache service using the following command:
net stop dnscache && net start dnscache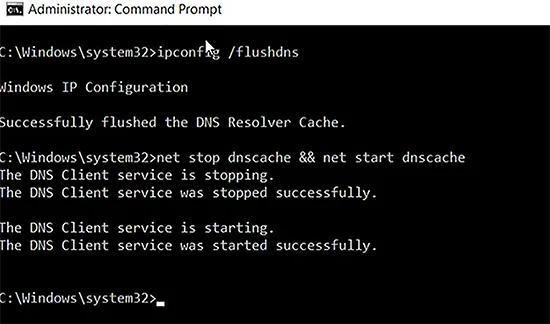
Or you can utilize the Service.msc console. Right-click on DNS Client to open its properties dialog:

Click on the Stop and Start buttons to halt and restart the service.
Check the Accessibility of the DC from the Client
To assess whether the domain controller is reachable from the client, initiate the following commands in a command prompt:
ping your_domain_name.com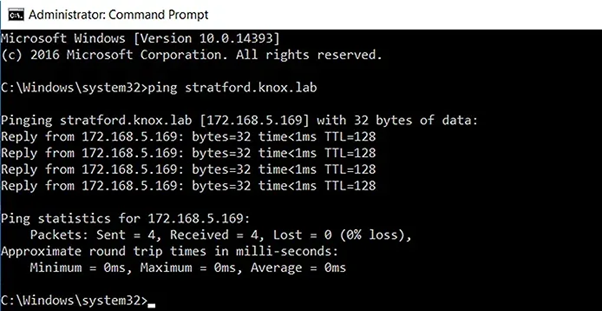
Further, execute this command:
tracert your_domain_name.com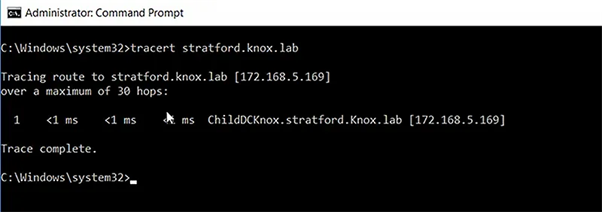
Additionally, examine the DC’s availability from another workstation on the same network. If your client is unable to access the DC while other clients succeed, then the chances are that the issue is with your client’s cable, hardware, or any intermediary device. To pinpoint the problem, experiment with a different network jack or switch to a wireless connection.
Verify DC Accessibility using PowerShell
You can also utilize the following PowerShell cmdlets to assess connectivity to the domain controller:
To display the IP address, use:
Get-NetIPConfiguration –All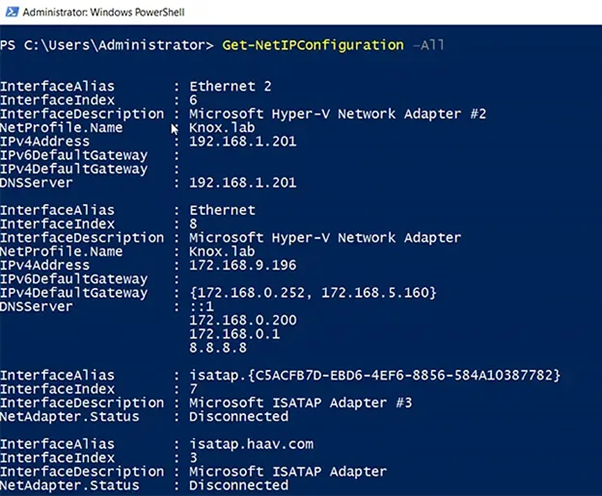
To ping the DC, use:
Test-NetConnection domainname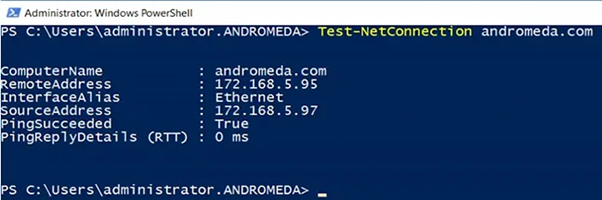
To trace the routes to the DC, use:
Test-NetConnection –TraceRoute domainname
To trace the routes to the DC, use:
Test-NetConnection –TraceRoute domainname
Configure the DNS Server in the TCP/IP Settings of Your Network Adapter
If the domain controller is accessible, add the IP address of your DNS server to the Advanced TCP/IP settings of your network adapter.
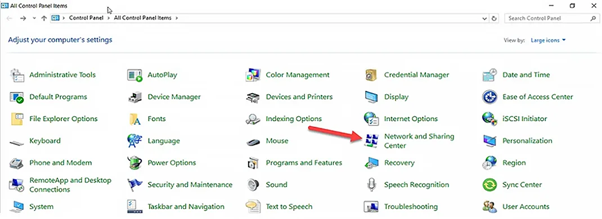
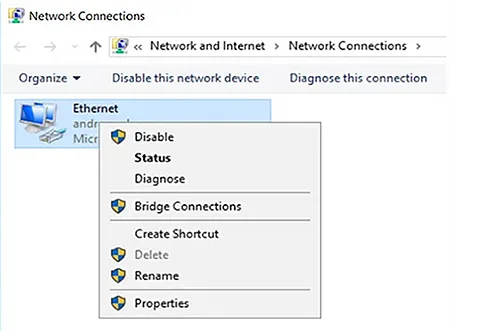
1. Open Control Panel, navigate to Network and Sharing Center, and then click Change adapter settings.
2. Right-click on the network adapter and select Properties.
3. Choose the Properties option by right-clicking on Internet Protocol Version 4 (TCP/IPv4).
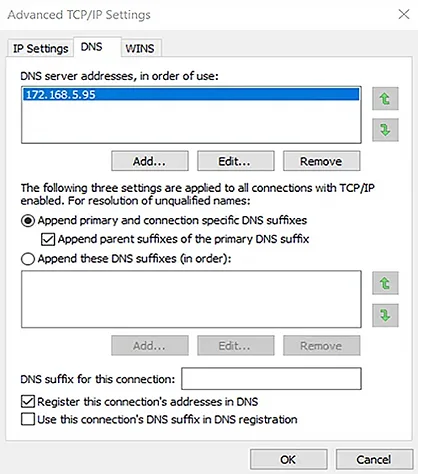
4. Click the Advanced button and navigate to the DNS tab.
5. On the DNS tab, click the Add button, add the IP address of your DNS server, and click OK. (Note: The DNS server might be a DC, particularly in small organizations.)
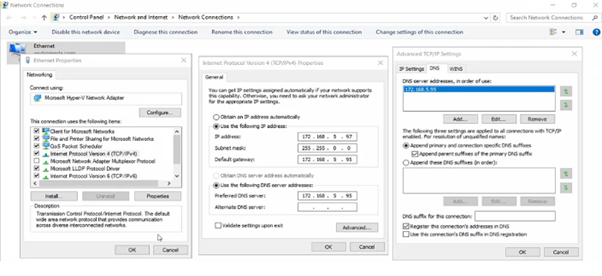
6. If multiple IP addresses are listed, use the arrow buttons to select your preferred one at the top of the list. Proceed by clicking OK.
7. To save the changes again, click on OK.
8. To make the changes effective, restart the workstation or server. After restarting, proceed with joining the workstation or server to the Active Directory domain again.
Verify Your DNS Server Configuration
DNS servers recognized by Domain Controllers (DCs) are crucial for registering records that aid AD-connected devices in locating resources, such as DCs. Hence, before delving deeply into troubleshooting, ensure that you are utilizing the correct DNS servers. DNS servers lacking AD integration lack these essential records.
Therefore, confirm that you are using one of the following types of DNS servers:
- A DNS server with Active Directory integration
- A DNS server replicating records from another DNS server aware of Active Directory
- A DNS server configured to query either an AD-integrated DNS server or a DNS server with duplicated records via forwarding
To check if your DNS server falls into one of these categories, employ the PowerShell cmdlet below in a PowerShell session on a domain-joined PC. (If another domain client is unavailable, please consult your network staff.)
Get-DnsClientServerAddress
The DNS servers utilized by the computer executing the cmdlet will be listed in the ServerAddresses column.
Option 1: Update the Computer’s DNS Client Settings
If you need to modify the computer’s DNS client settings, you can utilize the following cmdlet:
Set-DnsClientServerAddressAlternatively, access the IPv4 Properties dialog box for the computer’s network card by following this:
Navigate to Control Panel >> Network >> Internet >> Network Connections.Right-click on the network card, select Properties, then choose Internet Protocol Version 4 (TCP/IPv4), and click Properties.
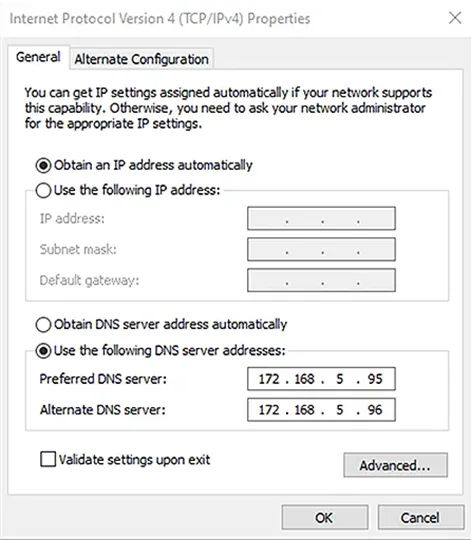
Confirm the settings:

Make sure that both the “Obtain an IP address automatically” and “Obtain DNS server address automatically” boxes are checked if your network supports Dynamic Host Configuration Protocol (DHCP).
If your network does not utilize DHCP, adjust the values for Preferred DNS server and Alternative DNS server according to the information obtained earlier (when you ran the Set-DnsClientServerAddress cmdlet).
Option 2: Connect to the Domain through Windows Settings
An alternative approach is to connect to the domain through Windows Settings. Here are the following steps:
1. Press the Windows and “I” keys on your keyboard to open the Window Settings window.
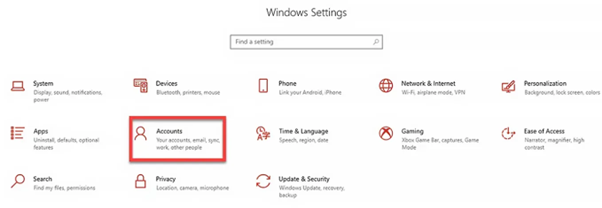
2. Click on “Accounts.”
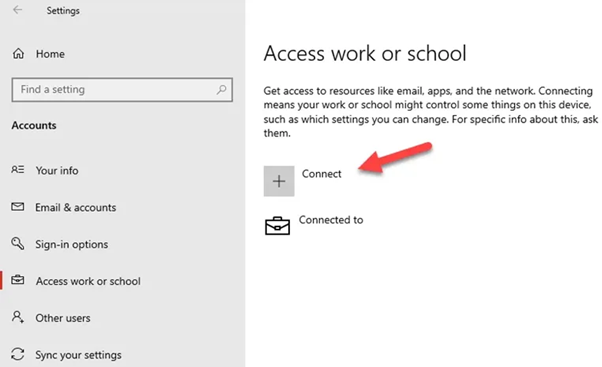
3. In the left menu, select “Access work or school.” Then click “Connect.”
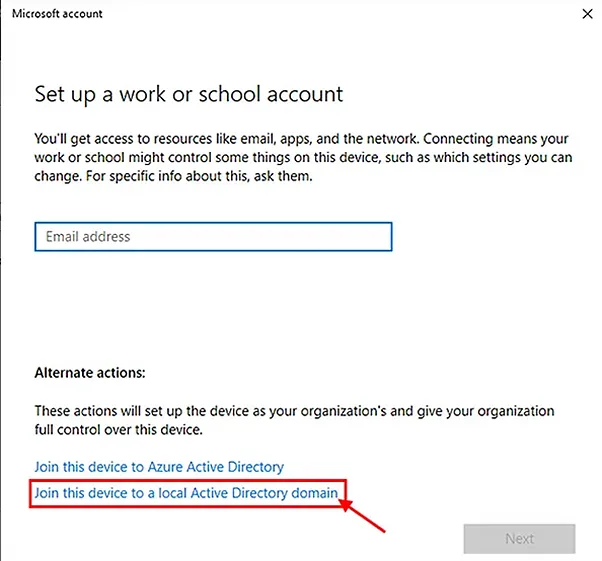
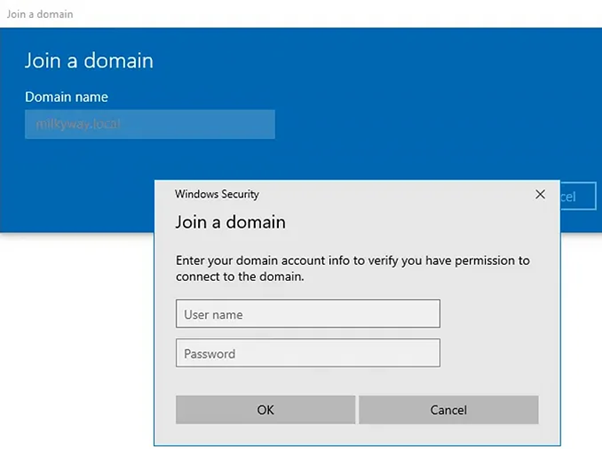
4. Click “Join this device to a local Active Directory domain,” shown at the bottom of the Microsoft account window.
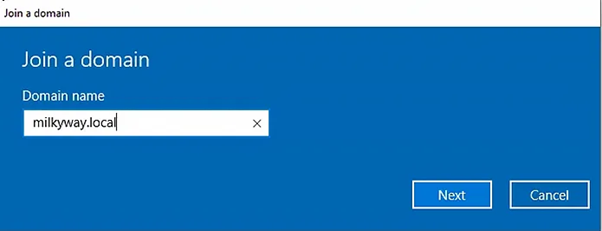
5. Give a valid and reachable domain name, then click “Next.”
6. Next, complete a domain account with the necessary permissions to join a workstation to a domain. Click “OK.”
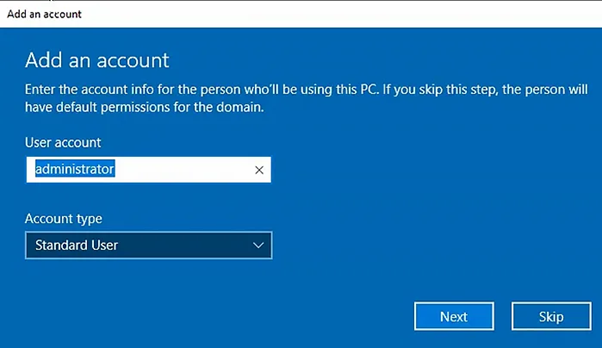
7. If no error occurs, your workstation is now successfully joined to the domain. On the next screen, supply a user account for this PC and click “Next.”
8. Click “Restart” to apply the changes.
Check if a Firewall is Blocking Port 53 on the DC
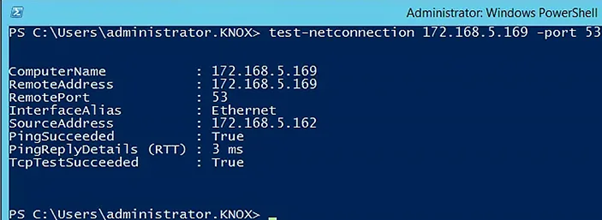
Verify whether the DNS service on the DC is being obstructed by a firewall. To determine if port 53 is accessible on the DC, run the following cmdlet:
Test-NetConnection 172.168.5.160 -Port 53Examine the value of “TcpTestSucceeded.” A value of “True,” as illustrated below, indicates that the DNS service on the DC is operational.
Verify if Your Computer Can Resolve the Domain Name of the DC
Confirm whether the workstation can resolve the domain name to the DC’s IP address. Utilize the fully qualified domain name of the domain you are attempting to join with your workstation using the Resolve-DNSName cmdlet, as shown below:
Resolve-DNSName fabrikam.local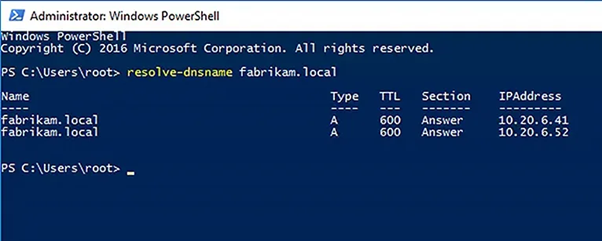
This command should yield one or more DNS server records.
Check if the Workstation Can Communicate with the DNS Server Hosting the DNS Zone
For this, assess the following:
- Confirm if the computer can establish communication with the DNS server responsible for hosting the DNS zone or resolving DNS names for the domain.
- Ensure that the DNS server configuration for the client is accurate and properly connected.
- Verify the ability to locate a domain and connect to the DC from your computer.
To retrieve domain and DC information, along with the IP address, utilize the following cmdlet:
nltest /dsgetdc:fabrikam.local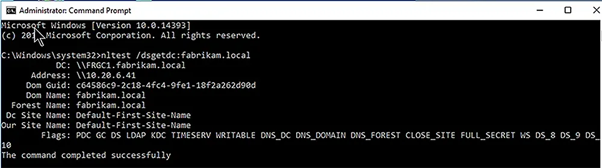
If the command is completed successfully, it will return information similar to the following:
yamlCopy codeDC: \\FRGC1.fabrikam.localAddress: \\10.20.6.41Dom Guid: c64586c9-2c18-4fc4-9fe1-18f2a262d90dDom Name: fabrikam.localForest Name: fabrikam.localDc Site Name: Default-First-Site-NameOur Site Name: Default-First-Site-NameFlags: PDC GC DS LDAP KDC TIMESERV WRITABLE DNS_DC DNS_DOMAIN DNS_FOREST CLOSE_SITE FULL_SECRET WS DS_8 DS_9 DS_10The command completed successfully.
Restart the Netlogon Service on the Domain Controller
Initiate a restart of the Netlogon service on the DC with the help of the following command:
net stop netlogon && net start netlogon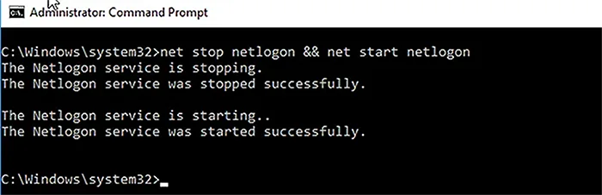
Or else perform a straightforward reboot of the DC.
Upon server restart, the DC will attempt to register the essential SRV records on the DNS server.
Re-register the DNS Records for the DC
Execute the following command to re-register the DNS records for the DC:
ipconfig /registerdns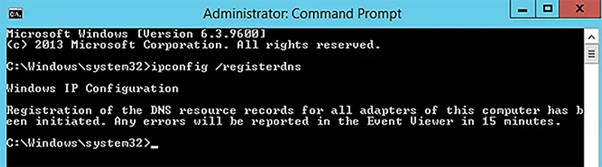
Allow time for the records to be updated in DNS and to propagate throughout the domain.


