Watch this video for a step by step process on How to Add Password to WordPress Admin (wp-admin) Directory via cPanel
You can access the WordPress admin area of your website from the WordPress admin(wp-admin) directory. Password protecting your wp-admin directory will create an additional security layer for your wp-admin area. This article will show you how to add a password to the WordPress admin (wp-admin) directory via cPanel.
To Add Password to wp-admin Directory
1. Log in to your cPanel account.
2. Go to the FILES section and click on Directory Privacy.

It will display the list of all the directories on your cPanel account.
3. You will have to locate the wp-admin folder. You can find it within the folder with the name of your WordPress account.
4. Click the EDIT button for the wp-admin folder.

The Security Settings for the wp-admin directory will open.
5. Here, you have to carry the following steps:
- Select the Password protect this directory option.
- Type a name in the Enter a name for the protected directory field.
- Click the Save button.

It will display a screen with a message saying you have successfully created the protected directory.
6. Click Go Back.
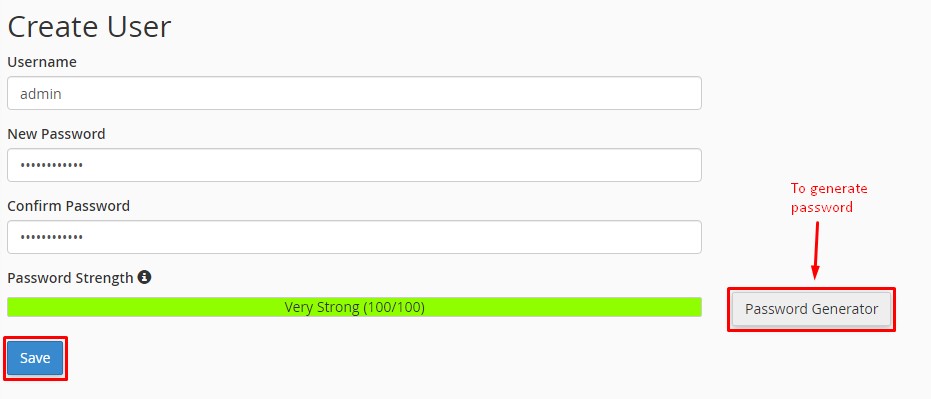
 The Create User section will appear with some fields for your login details.
- Username: Enter the username for your login
- Password: Enter/generate a password
- Confirm Password: Retype the password

6. Once you have filled in all details, click the Save button at the end.
This is how you add password protection to the wp-admin directory via cPanel. The next time you try to access your WordPress admin area, a new login window will appear, prompting you to log in.


