Watch this video for a step by step process on How to Add IP Address in Windows Firewall
The users with Windows operating system can add an IP address when they configure the Windows Firewall settings.
To Add IP Address in Windows Firewall
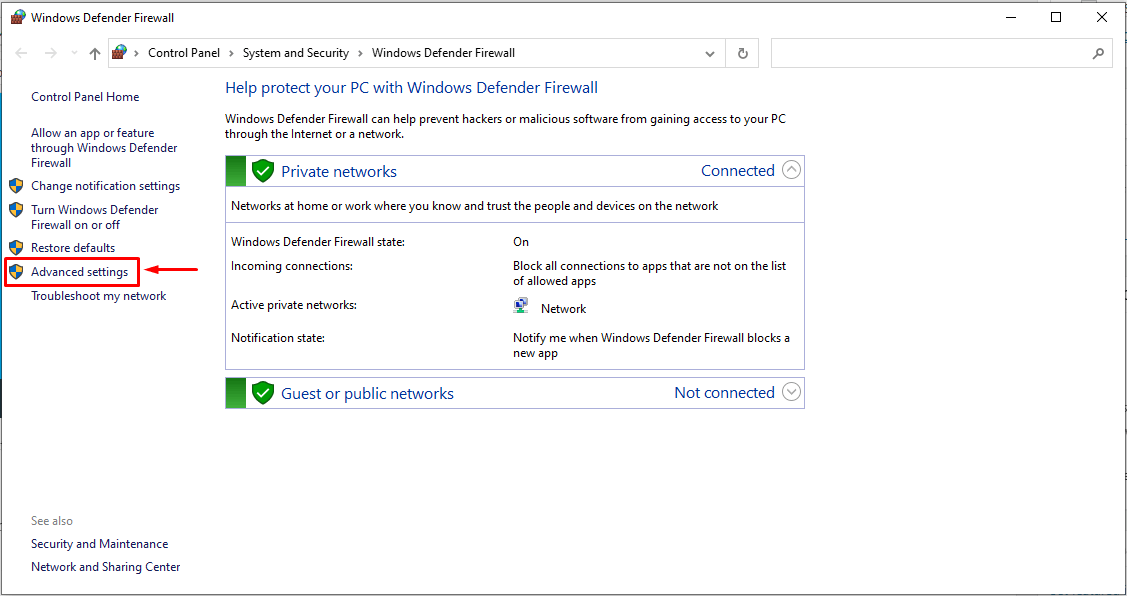
1. Open the Start menu and search for the Windows Defender Firewall option.

2. Select the Advanced settings option from the sidebar menu.

The Windows Firewall with Advanced Security panel will open.
3. Click the Inbound Rules option from the navigation menu.
4. Under the Actions section, click New Rule…

Windows Firewall will open a new window New Inbound Rule Wizard.
5. Select the Custom option and then select Scope

A form will appear in the window.
Here, you can add local and remote IP addresses.
6. Choose
- Any IP address for all corresponding IPs
- These IP addresses option to add the IP address
If you choose the latter, the Add… button will become functional.
7. Click on the Add… button.

Another window named IP Address will pop up.
8. Enter/Add the IP address and click OK.

The IP address you entered will appear in the list, meaning the system has successfully added it to the Firewall.

9. To further configure the Firewall settings click on Next >
It will take you to the step labeled Action.
10. Choose the action to take when a connection happens under your set conditions and click on Name.
11. In the Name section, you have to reenter the IP address in the Name: field.
You can also enter a suitable Description but, it is optional. So, I leave it to your discretion.
12. Click the Finish button to complete the procedure.
Windows will then add the IP address and apply the configurations to the Firewall settings.


