Watch this video for a step by step process on How to Add and Delete MX Records in Webuzo
Mail Exchanger Records or MX Records are resource records that belong in the Domain Name System. It is the one that specifies the mail server for the hosting account that accepts email messages for the recipient’s domain. Additionally, if there are multiple mail servers, it also has a preference value to prioritize mail delivery. With Webuzo, you can add and delete MX records with ease.
To Add MX Records
1. Log in to your user account of Webuzo.
2. Go to the Email section and click on MX Entry.

A list of present MX records will appear.
3. Click on the Add Record button.

The Add New MX Record window will appear. It will have details for the new MX record.
- Select Domain: The domain to induct the MX record.
- Priority: The numeric value to indicate the priority of the MX record. (‘0’ means the highest priority)
- Destination: A domain that acts as a destination for the email.
4. Enter the details in the specified fields and click on Add Record.

A success message will appear as the record is added to the list.

5. Click Ok to continue.
To Delete MX Records
1. Log in to your user account of Webuzo.
2. Go to the Email section and click on MX Entry.

A list of present MX records will appear.
3. Click the trash icon of the MX record you want to delete.

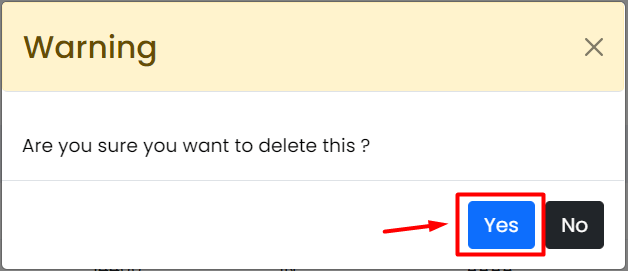
A Warning window will pop up asking for your confirmation.

4. Click on Yes.
It will remove the MX record from the list.
This is how you can add and delete MX records in Webuzo.


