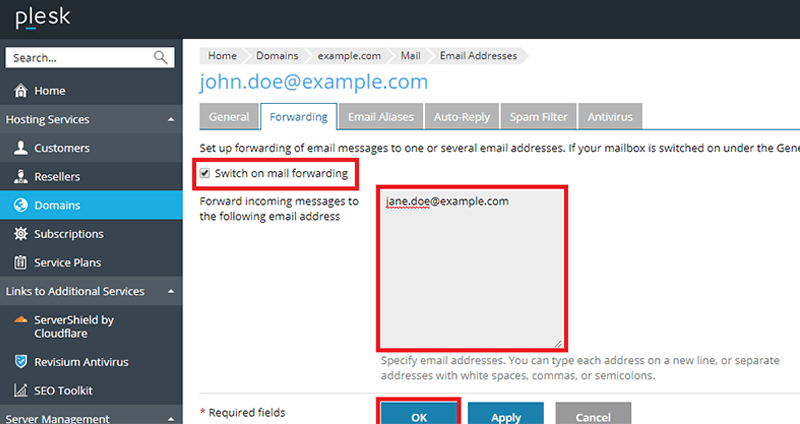
E-mail forwarders allow you to send messages automatically from one account to another account.
This article guides you on how you can configure e-mail forwarder in Plesk.
# To enable e-mail forwarder perform the following steps :
1. Log in to Plesk.
2. On the left side of the sidebar, click on Mail.
3. The mail page will appear. On the page click on the e-mail address for which you want to create a forwarder.
4. Click on Forwarding tab.
5. Select the Switch on mail forwarding check box.
6. Type the email address to which you want to forward your messages in the Forwarding incoming messages text box.
7. Click on OK. Plesk will activate the forwarder for the specified e-mail account.
# To disable the e-mail forwarder, perform the following steps :
If you no longer need the email forwarder service, you can disable it by following these steps
1. Log in to Plesk.
2. On the left side of the sidebar, click on Mail.
3. The mail page will appear. On this mail page, click on the e-mail address for which you want to disable the forwarder.
4. Click on the Forwarding tab.
5. Uncheck the Switch on mail forwarding check box.
6. Click on OK. Plesk will disable the forwarder for the specified e-mail account.
That’s it.
Also Read :


