You can modify the appearance of cPanel of your customers along with the webmail interface. You can easily add your company’s logo or a custom footer. In this guide, you will learn to make a copy of your existing cPanel branding style by going to the editable options and setting it as the default cPanel style.
1. Login to WHM with your credentials.
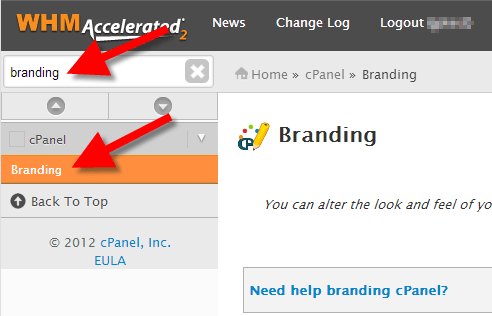
2. Hover to the top left search box and type branding. Click on Branding when it appears.
3. There will be two options listed – one for webmail and one for cPanel. Next, click on the Live Editor link besides the one which you want to edit. (The option for webmail ends in mail.)
4. Go to the Create or Upload Branding button and click on it.
5. Now go to the Create a new branding style section and give a name to your new template. Click on the Create button. Here, we have named as custom-cpanel. After this you will see a message starting that “The branding style custom-cpanel was successfully created.”
6. Next, click on the Go Back to Branding Editor button.
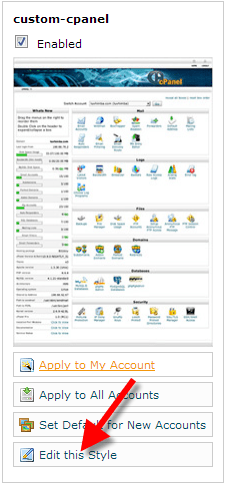
7. Then scroll down and search for the branding style you created and click Edit this Style.
You will now see edit options. Check below the brief description of what can be modified:
| Option | Description |
|---|---|
| Edit Logos | With this option you can change your logos, upload a custom one, and edit the CSS for the logos. |
| Edit Icons | It allows you to modify the icon buttons displayed in the cPanel. You can select a new file for replacing the existing icons. |
| Edit Header/Footer | This option allows you to modify the images and buttons in the header and footer on this page. |
| Edit UI | UI is short form for user interface. This option lets you modify buttons and the way they respond. You will see the examples of the existing buttons to help identify what you are modifying. |
| Edit Preview Images | With this option, you can modify the appearance of your custom branded style in the Branding Editor list. |
| Edit HTML Pages | You can directly edit a style's HTML with this option. |
| Edit Style Sheet | This allows you to edit the CSS for the style sheet here. |
8. Your new custom branded style can be set to default style in the Branding Editor. For this you will need to click on Set Default for New Accounts. This will lead the new accounts to use the new custom branded cPanel you created.
Congratulations! You have now learnt about making a copy of an existing cPanel branding style, become familiar with the options, and also, know to set it as the default cPanel style.


