Click on the download link in your fulfillment email or from your MilesWeb’s SSL Manager account to download and unzip your certificate files. In PKCS#7 (P7B) format, you will find one .cer file containing your domain SSL server certificate and any needed intermediate CA certificates. Copy the file and save it on the same server as the CSR was created.
your_domain_com.cer
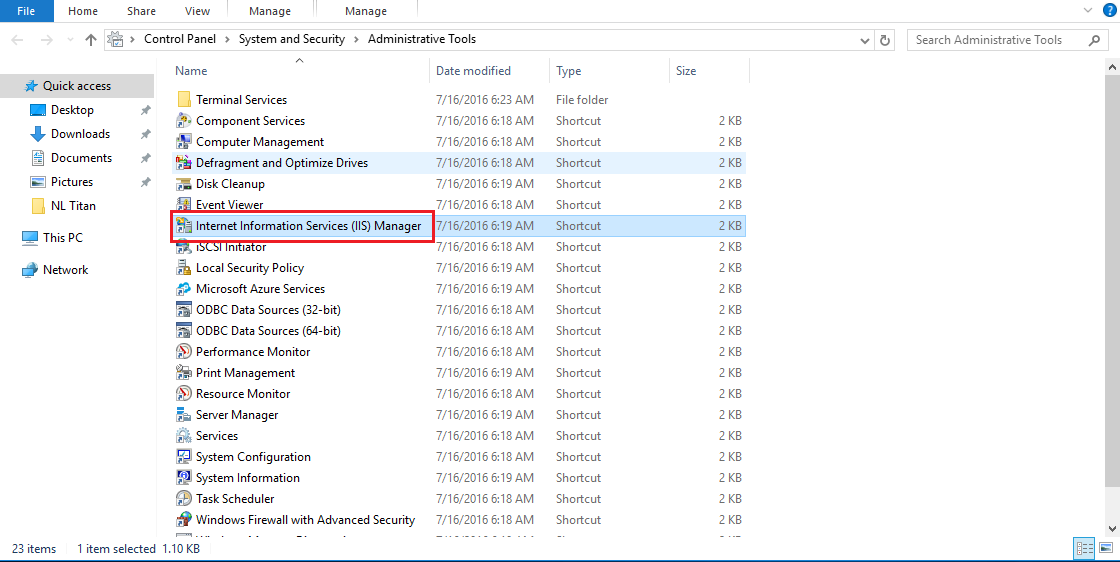
1] Open the Internet Information Services (IIS) Manager program. Select Control Panel> System and Security > Administrative Tools > Internet Information Services (IIS) Manager from the Start menu.
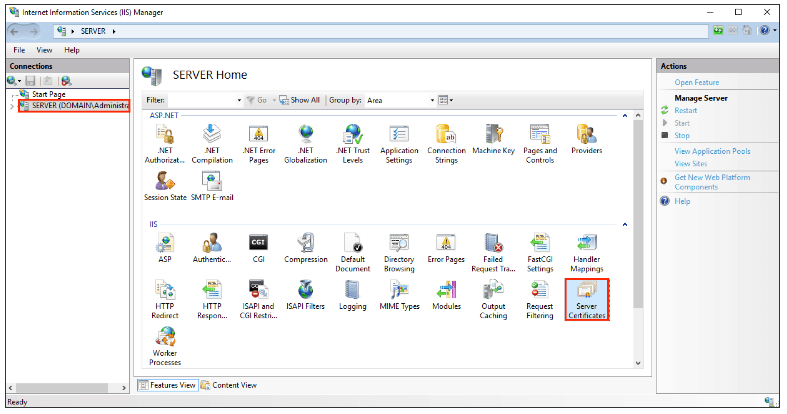
2] From the IIS Manager, choose the server node on the top left under Connections and double-click the Server Certificates.
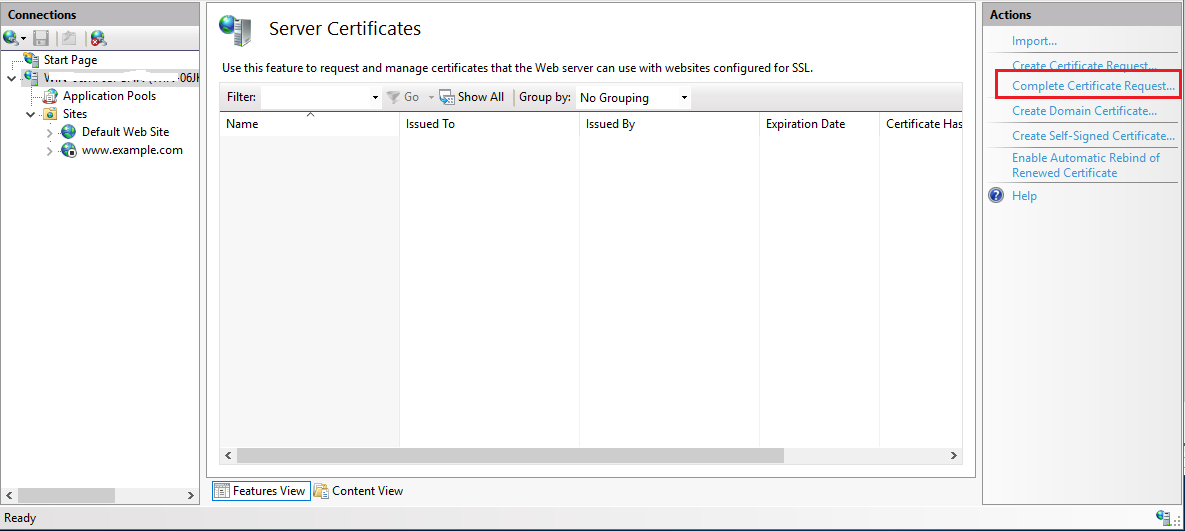
3] Now, click on Complete Certificate Request from the Actions pane on the top right.
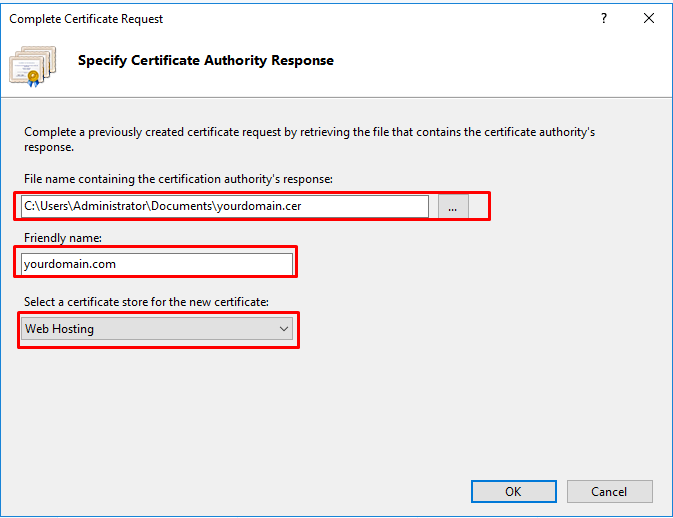
4] Navigate to the downloaded file your_domain_name.cer. After that, you’ll be asked to provide a friendly name, here we have used example.com. The friendly name is not part of the certificate itself, but it is used by the server administrator to recognize the certificate. Select Personal for Select a certificate store for the new certificate: option.
5] And, click on OK to install the SSL certificate.
BUG WARNING: There is a known problem with IIS that results in the following error: Failed to remove the certificate. If this is the same server as you created the CSR, the certificate should be deployed in most circumstances. To refresh the list of server certificates, just cancel the box and press F5. If the new certificate is currently in the list, it was successfully installed on the server. If it is not on the list, you must reissue your certificate with a new CSR.
6] After successfully installing the SSL Certificate on the server, you must assign that certificate to the right website using IIS.
7] Select the name of the server to which the certificate was installed from the Connections menu in the main Internet Information Services (IIS) Manager window.
8] Now, select the site to be secured with SSL from Sites.
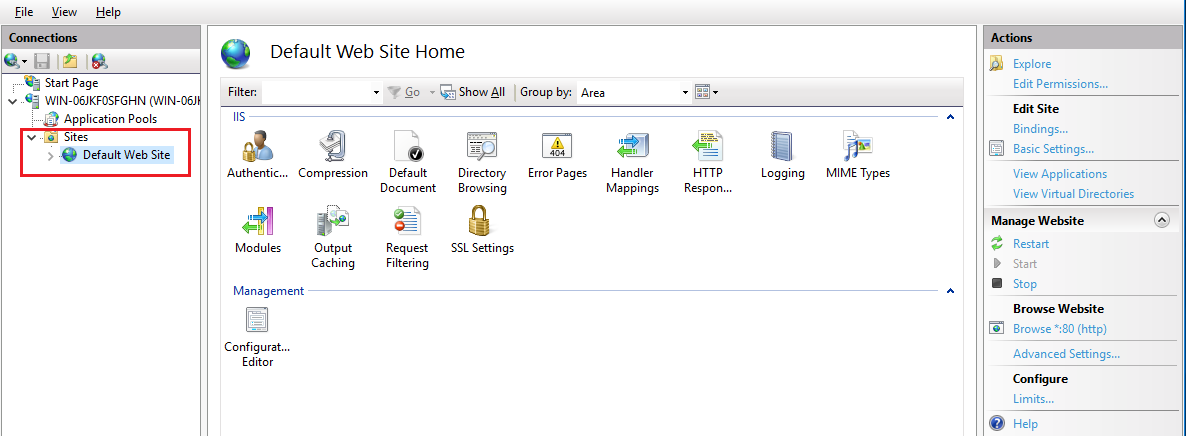
9] Click on Bindings… from the Actions menu (on the right) to open the Site Bindings window.
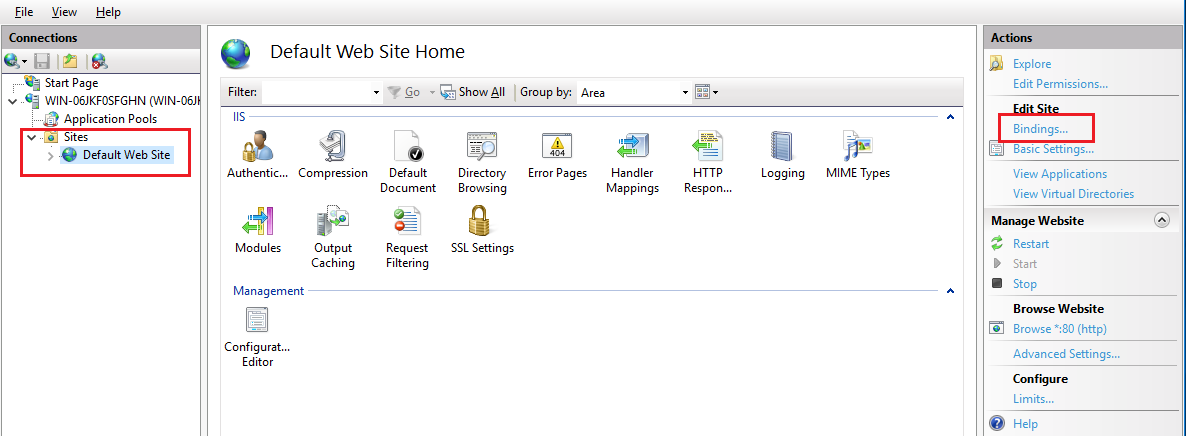
10] Click Add.. In the Site Bindings window, open the Add Site Binding window.
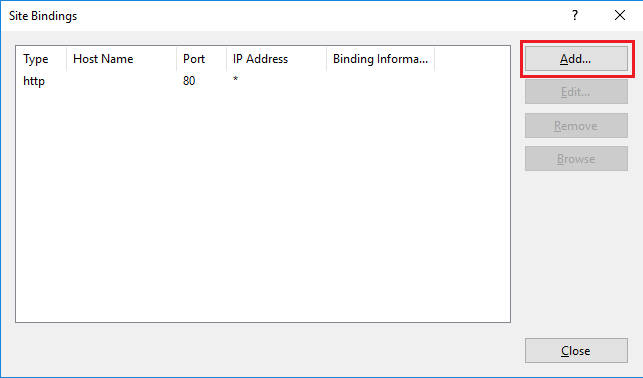
11] Select https under Type. The IP address should be the site’s IP address or All Unassigned, and the port on which SSL traffic will be encrypted is normally 443. The SSL Certificate field should include the certificate installed in the step. If the site is currently protected, the HTTPS type will be mentioned in the Site Bindings pane. In this scenario, you’ll pick HTTPS and then click the Edit… option.
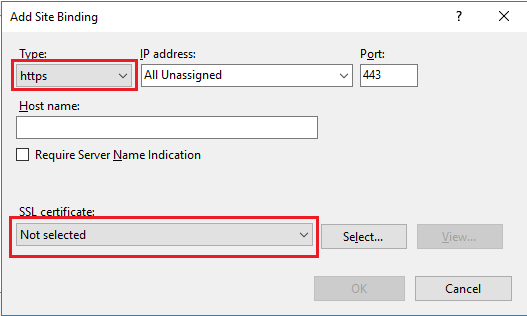
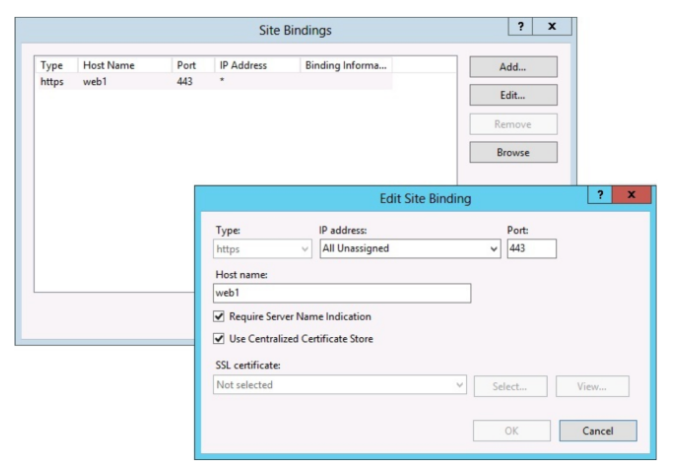
12] From either the Add Site Binding or Edit Site Binding windows, pick the new certificate from the SSL Certificates drop-down box. If you’re creating a new binding, you’ll also select the Type: HTTPS, IP address: All Unassigned, and Port: 443.
13] Now, click OK then Close the Site Bindings window.
14] If your certificate has several Site Names (SANS), you must repeat the Bindings Section for each site.
Steps to Verify Installation:
- Use Certificate Installation Checker or SSL Checker to ensure that your certificate is properly installed.
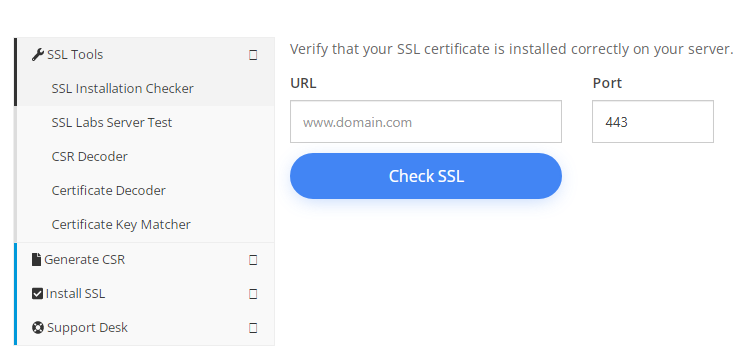
- Connect to your server using a browser to test your SSL certificate. The https protocol directive should be used. Enter https://secure.mysite.com into your browser if your SSL was given to secure.mysite.com.
- If your certificate is correctly installed and the server is properly configured for SSL, the padlock symbol in your browser will be locked.
And, that’s how you install an SSL certificate on Microsoft IIS and assign it to the relevant website.


