Overview
This article describes the steps to how you can quickly and easily install WordPress via the WordPress Toolkit.
WordPress Toolkit:
It is a feature-rich management interface that allows you to install, configure and manage WordPress. In the cPanel account, you will find the WordPress toolkit option.
With this, you can also install new WordPress, import existing WordPress installation by clicking on the Scan button.
WordPress toolkit comes with different features like installing, themes, clone, security, backups/restore. In short, the WordPress toolkit includes everything you need to take control of your WordPress websites.
You can go to WordPress Toolkit in cPanel and install WordPress, plugins and themes directly.
Steps to Install WordPress via Toolkit in cPanel:
- The first step is Login to your cPanel.
2. In the cPanel dashboard, click on WordPress Toolkit.
3. After clicking on WordPress Toolkit, click on the Install WordPress button.
It will take you to the installation page. Here, you will need to fill in all the details for your WordPress websites.
Installation Path: Select the path where you want to install your WordPress site.
Website Title: Enter the title of your WordPress site.
Plugin/theme Set: Select the particular set of themes/plugins you want to install for your WordPress.
Website Language: Choose the language for your WordPress site.
Version: Select the latest version.
Administrator Details:
Username: WordPress admin account username.
Password: Password of your WordPress admin account.
Email Address: Email address of your WordPress admin account.
After filling all the details, you also need to add the MySQL database details. Then click on the install button.
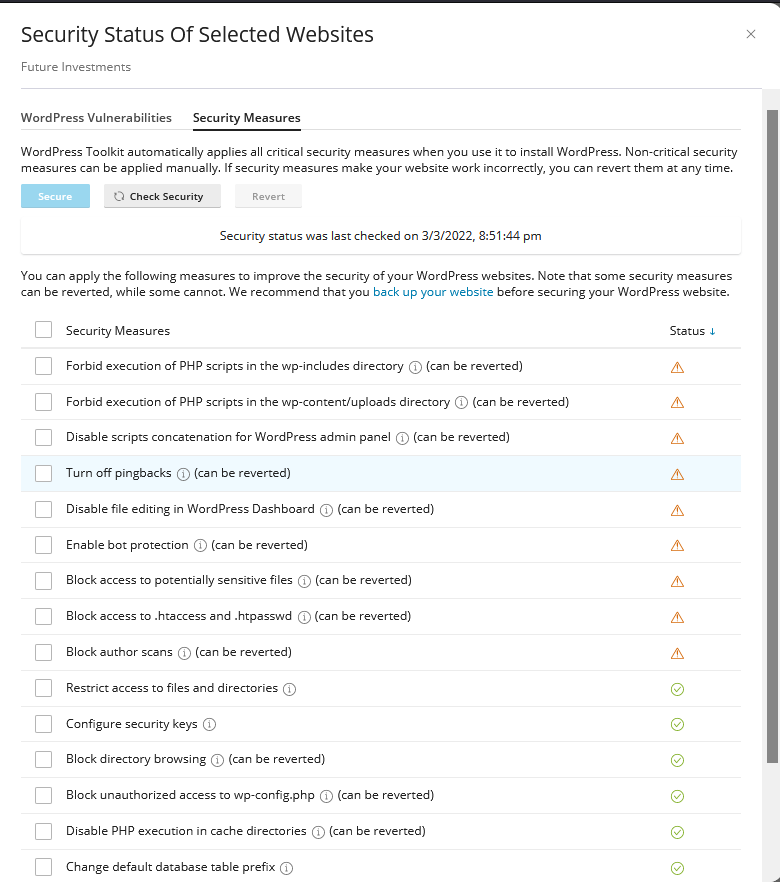
4. Once the WordPress installation process is done, you will find an option to secure WordPress.
5. By clicking on security, you will get to see the below screen
6. You can click on Check Security, and the below screen will appear.
Multiple security features can be enabled for WordPress installation as shown in the above image.
7. You can also check for WordPress vulnerabilities under the security option.
Through the WordPress vulnerability feature, you can find all the vulnerabilities under WordPress and repair them or add security.
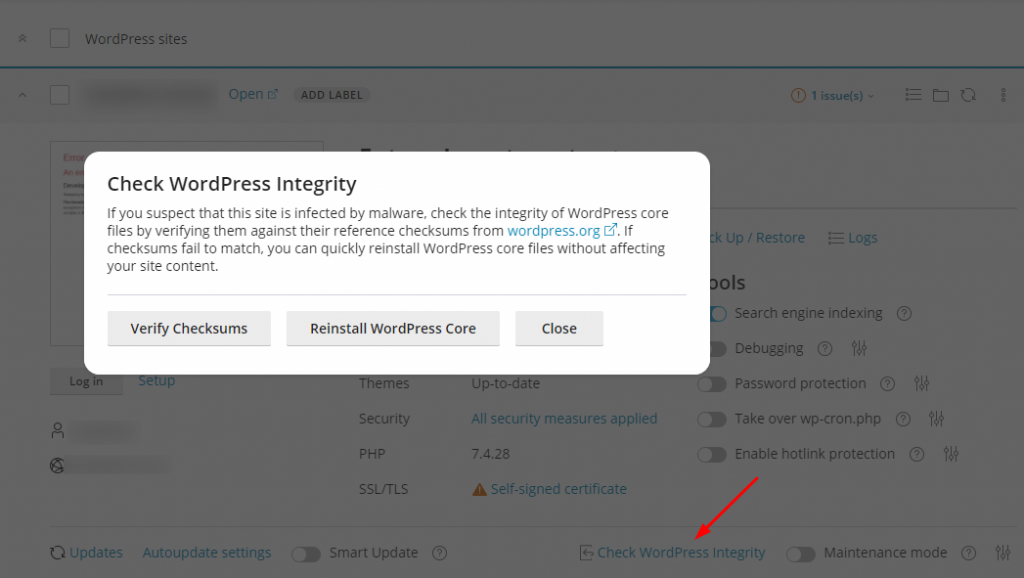
- If you have any issue regarding the malicious content in the file, you can import the existing WordPress and enable these security features for website.
- Also, if a WordPress site has outdated core files, you can import WordPress.
- The above-mentioned steps can be performed to clean WordPress and add security features so that no issue will occur again.
This is all about the WordPress toolkit!


