Watch this video for a step by step process on how to Add an SSL Certificate from Other Certificate Authorities on Plesk
It is possible to secure your website with SSL using Plesk. You can use Let’s Encrypt to issue a free SSL certificate for your website. The other way to certify your websites with SSL is to purchase an SSL certificate and upload it on Plesk.
To Upload and Assign an SSL Certificate from Other Authorities:
1. Log in to the Plesk panel.
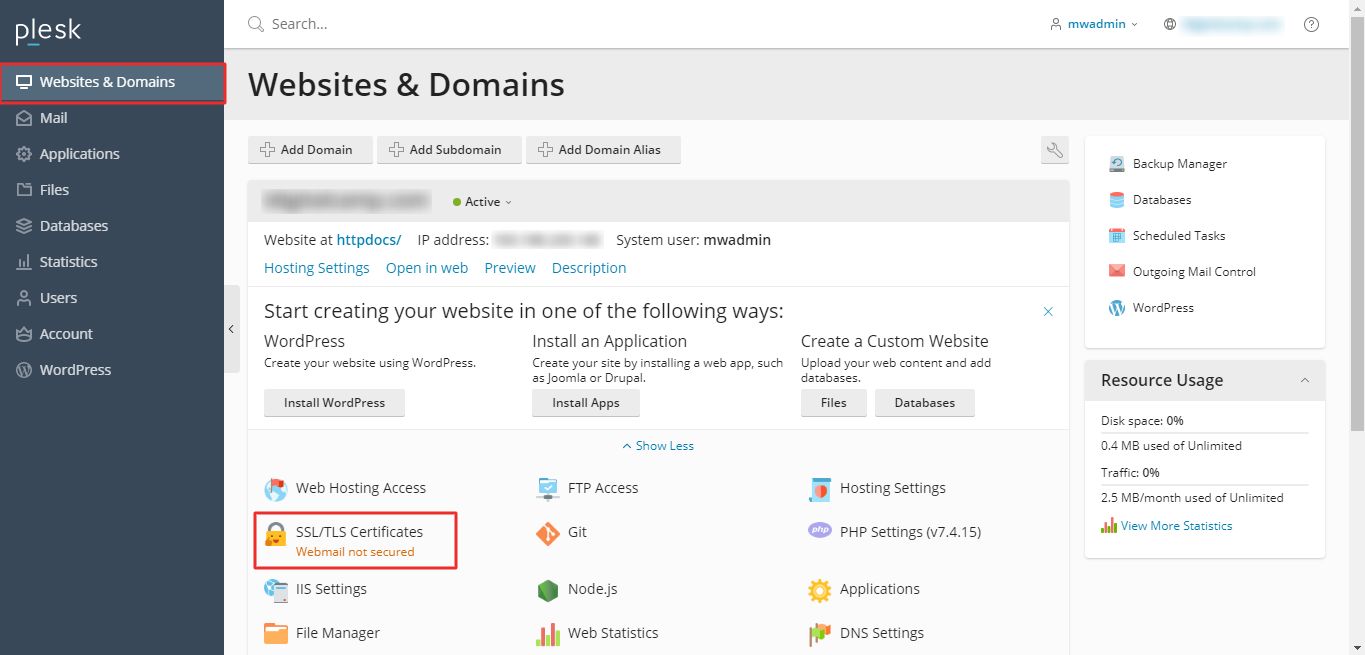
2. Go to Websites & Domains and click on SSL/TLS Certificates.

3. Click on Advanced Settings.

4. Click Add SSL/TLS Certificate.

5. Fill in a name for your SSL certificate in the Certificate name field and scroll to Upload the certificate files section. Click on Choose Files to select the files and upload them as parts of your certificate.
Note: If a *.pem file has the certificate and the private key sections of your certificate (you can check by opening the file in any text editor), upload it twice for both the private key and the certificate.
When all is ready, click on the Upload Certificate button.

Alternatively, you can upload the certificate files in text format. Convert the SSL files in text format and paste the content of the text files in the respective fields as shown below and click on Upload Certificate:

A success message is generated that prompts you to assign the certificate to your domain, mail or webmail. Also, the SSL certificate gets automatically added to the list, as shown in the screenshot below.

7. Go back to Websites & Domains and click on Hosting Settings.

8. Go to the Security section and tick the box for SSL/TLS support. Select the SSL certificate you added from the dropdown list and click on the OK button.

A success message is generated declaring the assignment of the SSL certificate.


