Admitad is an affiliate network which uses an Admitad template. The template tracks the user’s data on a website and sends the data to website owners. As far as an affiliate network is concerned, it handles the technical interaction side between advertisers and publishers.
Integrations with advertisers’ sites and apps, tracking clicks and managing stats are possible with the Admitad Template. For better tracking, it is recommended to integrate the Admitad Template with GTM (Google Tag Manager).
Follow the key steps given below to integrate the template with GTM.
Steps to Integrate Admitad Template with GTM
For Admitad template integration we need a .tpl file. Get the template.tpl file from either the Admitad website or their GitHub repository. (https://github.com/AdmitadSDK/Admitad-GTM-Tracking-Template)
1. Go to Google Tag Manager -> Click on Templates -> Click on search gallery option.

2. Search Admitad Tracking Tag Template.

3. Click on Admitad Tag Template -> Click on Add to workspace -> Click on “Add” button.
4. Click on new Template added -> Click on three dots at the right hand corner of Template Editor window -> Click on import option to import template.

5. Browse the .tpl file and import it -> Click on Save button.
Create Tag to configure imported templates
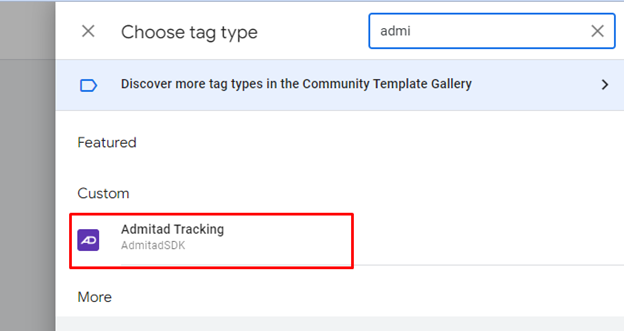
1. Click on tag -> Select new tag -> Choose tag type -> Select Admitad Tracking.
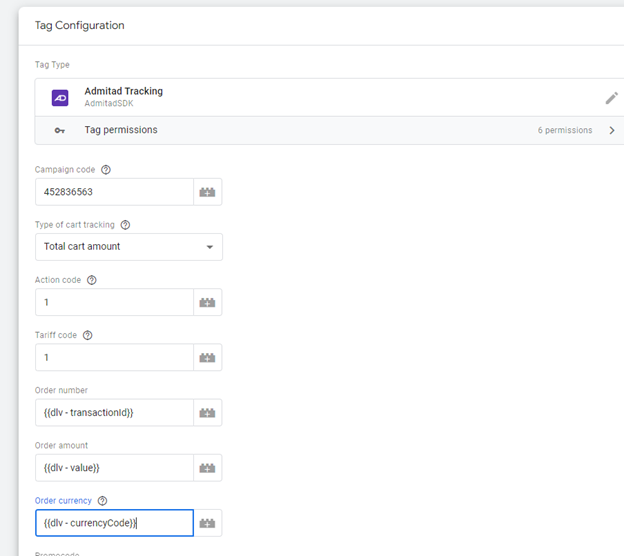
2. Enter the campaign code and type of cart tracking which you want to track – > Select Total cart amount option, Action Code -1 , Tariff Code -1.


3. Follow the steps mentioned to enter order number, order amount, order currency, promo code”
Create a user defined variable to create variable -> Go to the variables module -> Click on new -> Choose data layer variable option -> Enter data layer variable name -> Set the variable name.
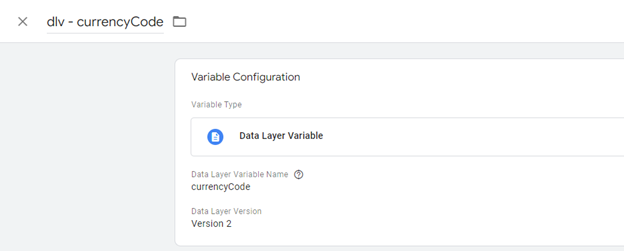
4. Set variables for order number, amount, and currency if you have promo code then set variable to promo code.
5. Select Last paid click URL parameters as “utm_source”, Additional last paid click URL parameters as gclid, fbclid which you want set , it may be empty if you don’t want.
6. Set Admitad traffic unique value as default admitad. Cookie lifetime (days) default 90.
7. Choose suid default “gtm_template” , user agent also gtm_template. Specify the main domain name e.g. .abc.com (with dot at the beginning).
Set Trigger To Track Admitad Template
Set up 2 triggers: DOM Ready – All pages + purchase event trigger
1. DOM Ready trigger to Page view set.
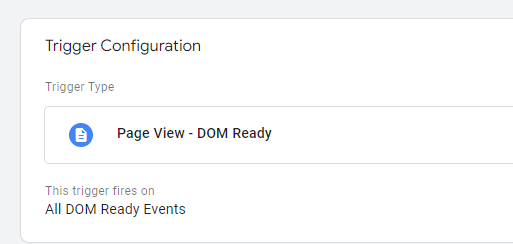
2. Purchase event trigger – As per your requirement set custom trigger, set event name and {page url} to trigger fire.
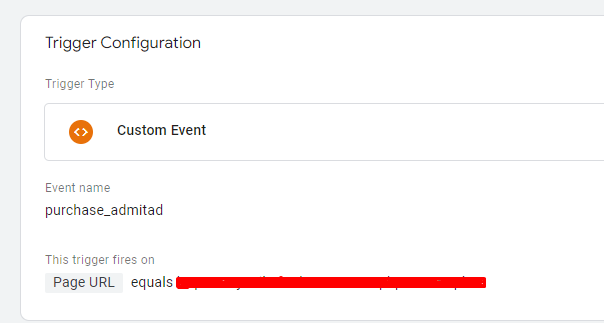
3. To set data layer to track value, Set event name, order value, order id and currency
<script>
window.dataLayer = window.dataLayer || [];
dataLayer.push({
'event': 'purchase_admitad',
'value': 'TotalDue',
'transactionId': 'OrderNumber',
'currency': 'currency.code'
});
</script>We encourage you to experiment with Admitad templates and GTM and witness the transformative power of this integration firsthand. Remember, the key to success lies in understanding your audience, choosing the right affiliate programs, and deploying effective tracking mechanisms. With Admitad and GTM by your side, you’ll be well on your way to conquering the affiliate marketing landscape.


